Hi All, we are having issues getting past the login for our units. Below is a picture of what keeps coming up. Anyone else experiencing this?

1 Like
Jeremy, I’m so sorry to hear that you’re having difficulty accessing your data, here are a few things to try:
- I think we may have made a mistake when initially configuring your access, please try again using that email address.
- If you are still unable, please confirm that you are trying to log in using the Google Account (ending in hardin.kyschools.us) provided by your school.
- Double-check that the devices are connected to your network.
- The ethernet cord should connect from the side of the MV1 to the ethernet port in your wall.
- This shouldn’t prevent you from being able to login to the web application, but I’m not seeing data from your devices on the backend either so I’d like for you to check their connection as well.
- Once connected, reboot the device by unplugging its power and then plugging it back in.
- After rebooting, verify that BOTH lights are blinking on where the ethernet cable connects (See below diagram) on the side of the MV1 brain.
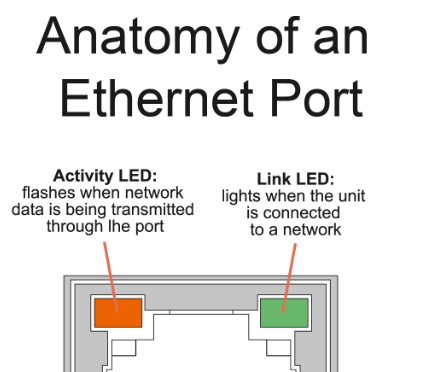
this image was updated on 01.10.24, the previous version was inaccurate.
Orange/Amber = Activity
- Flashing is good, that means it’s at least receiving data
- No light means it’s not receiving or sending data
Green = Link
- If this is on, it indicates that your ethernet port is working and connects to the school network. This doesn’t necessarily mean that anything is being sent/received though.
- If it’s off, then you don’t have a working ethernet port.
Here’s another post by Steven where he goes over a similar process of what to do if the device isn’t connected - he also shows photos of where things connect:
@jodlowskik FYI - to help troubleshoot ethernet connectivity problems check the two LED indicator lights on the side of your MV1.
@jeremy.hall, please see below instructions for installing a new SD card into your MV1. These same instructions can also be used by @cregini @Surendra @NateReyes and anyone else upgrading to the the ‘Strawberry’ version of software.
- You should have received a package with a new MicroSD card. Those sent in October have a ‘Micro Center’ brand on them - which should be different from what was in your device previously. Just in case you get them mixed up!

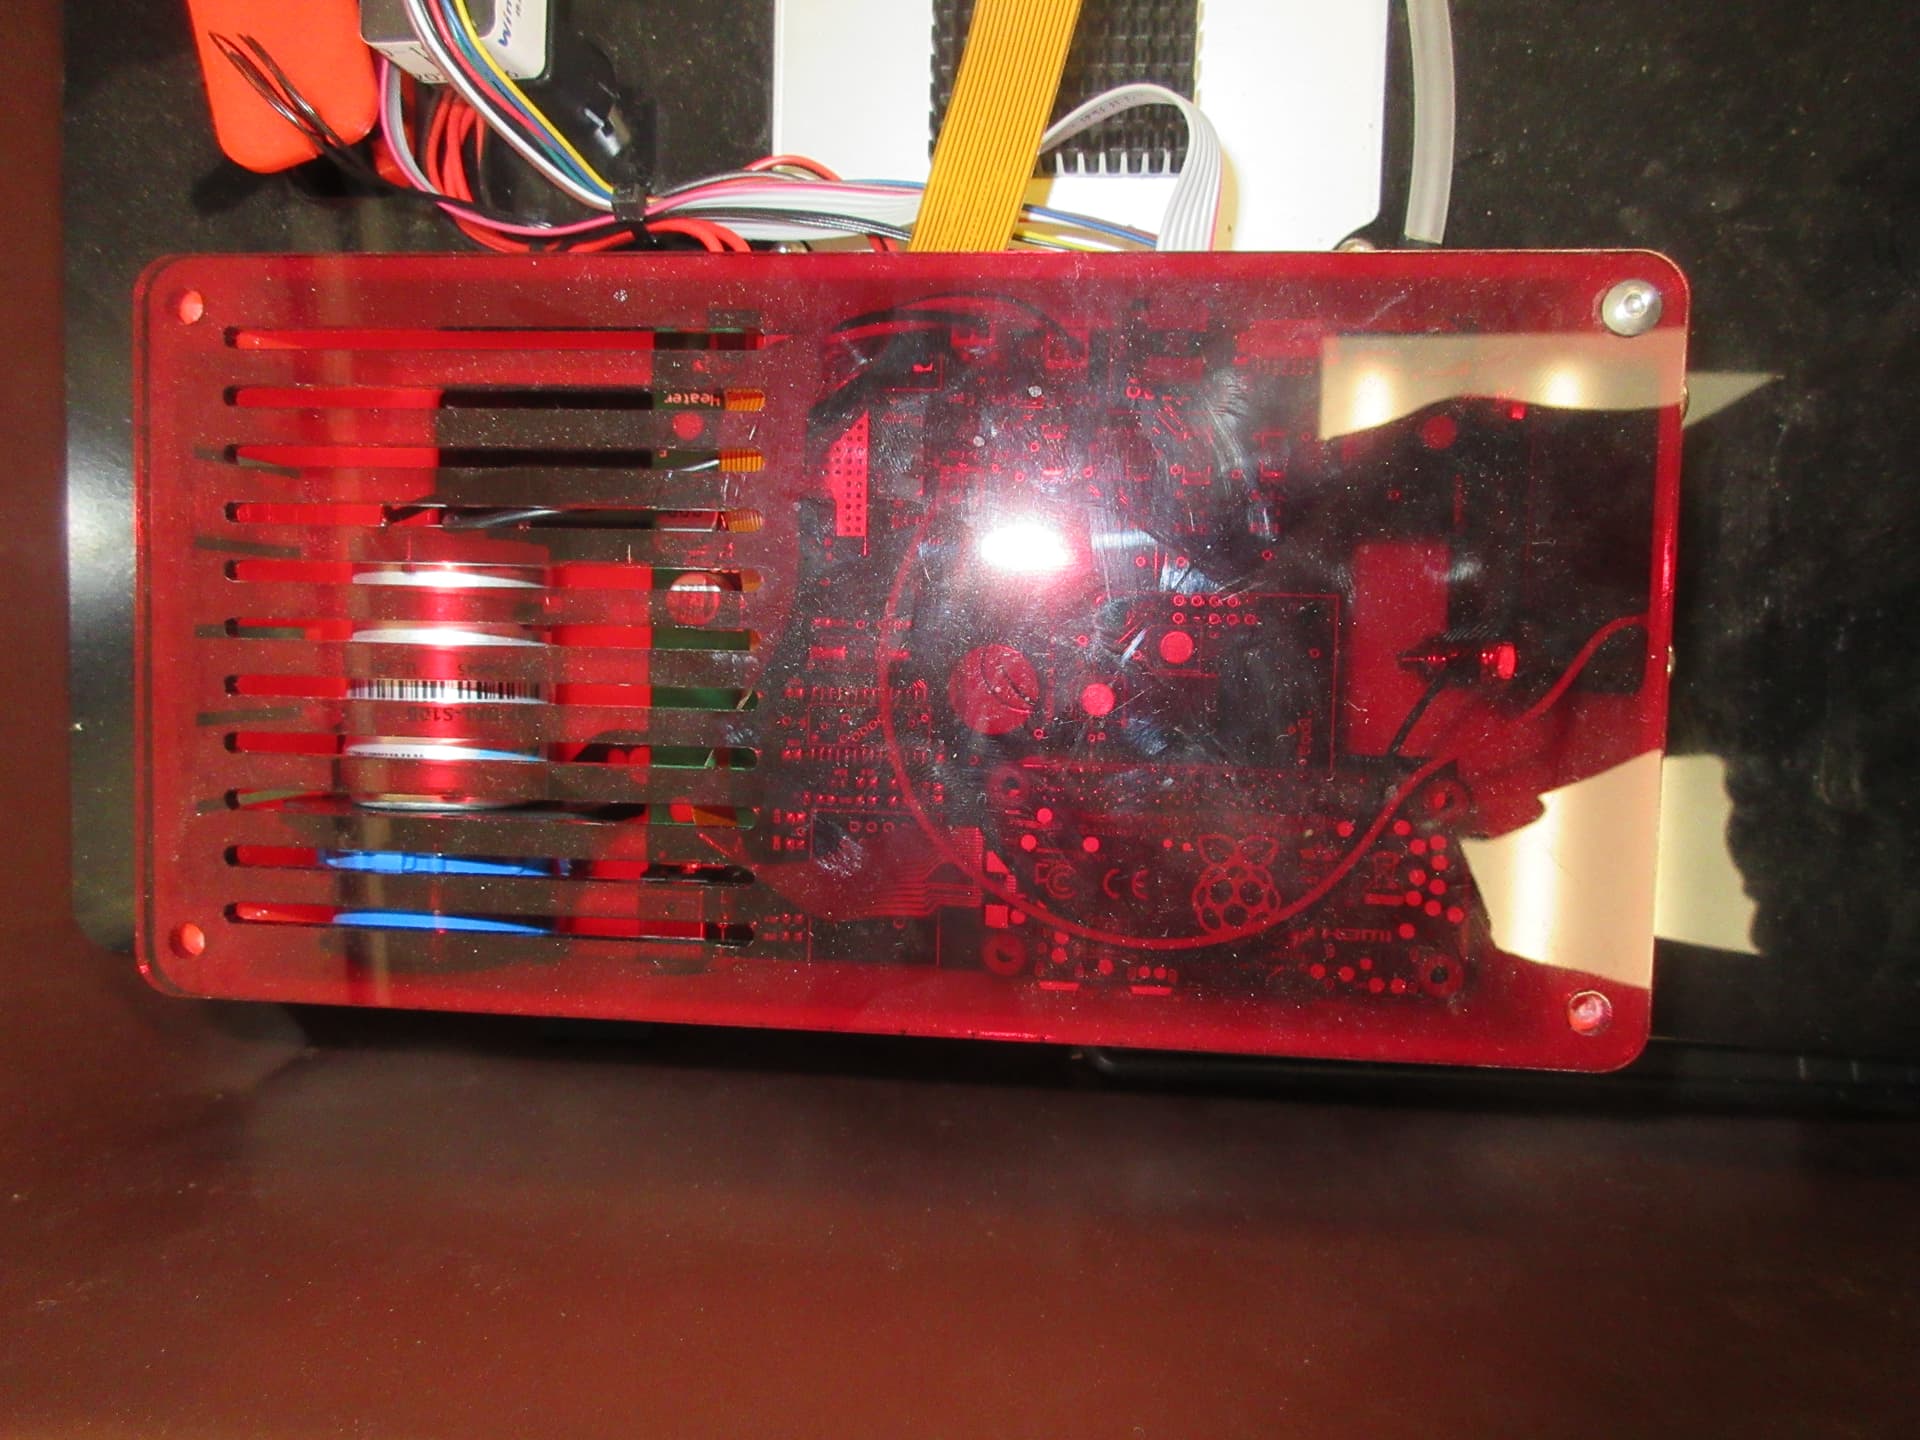
- Remove the four screws that secure the cover of the enclosure where the Raspberry Pi is located. You will need to remove at least three of the screws to switch out the SD card in the Raspberry Pi. Depending on your version, this will either be a transparent red color, or clear.

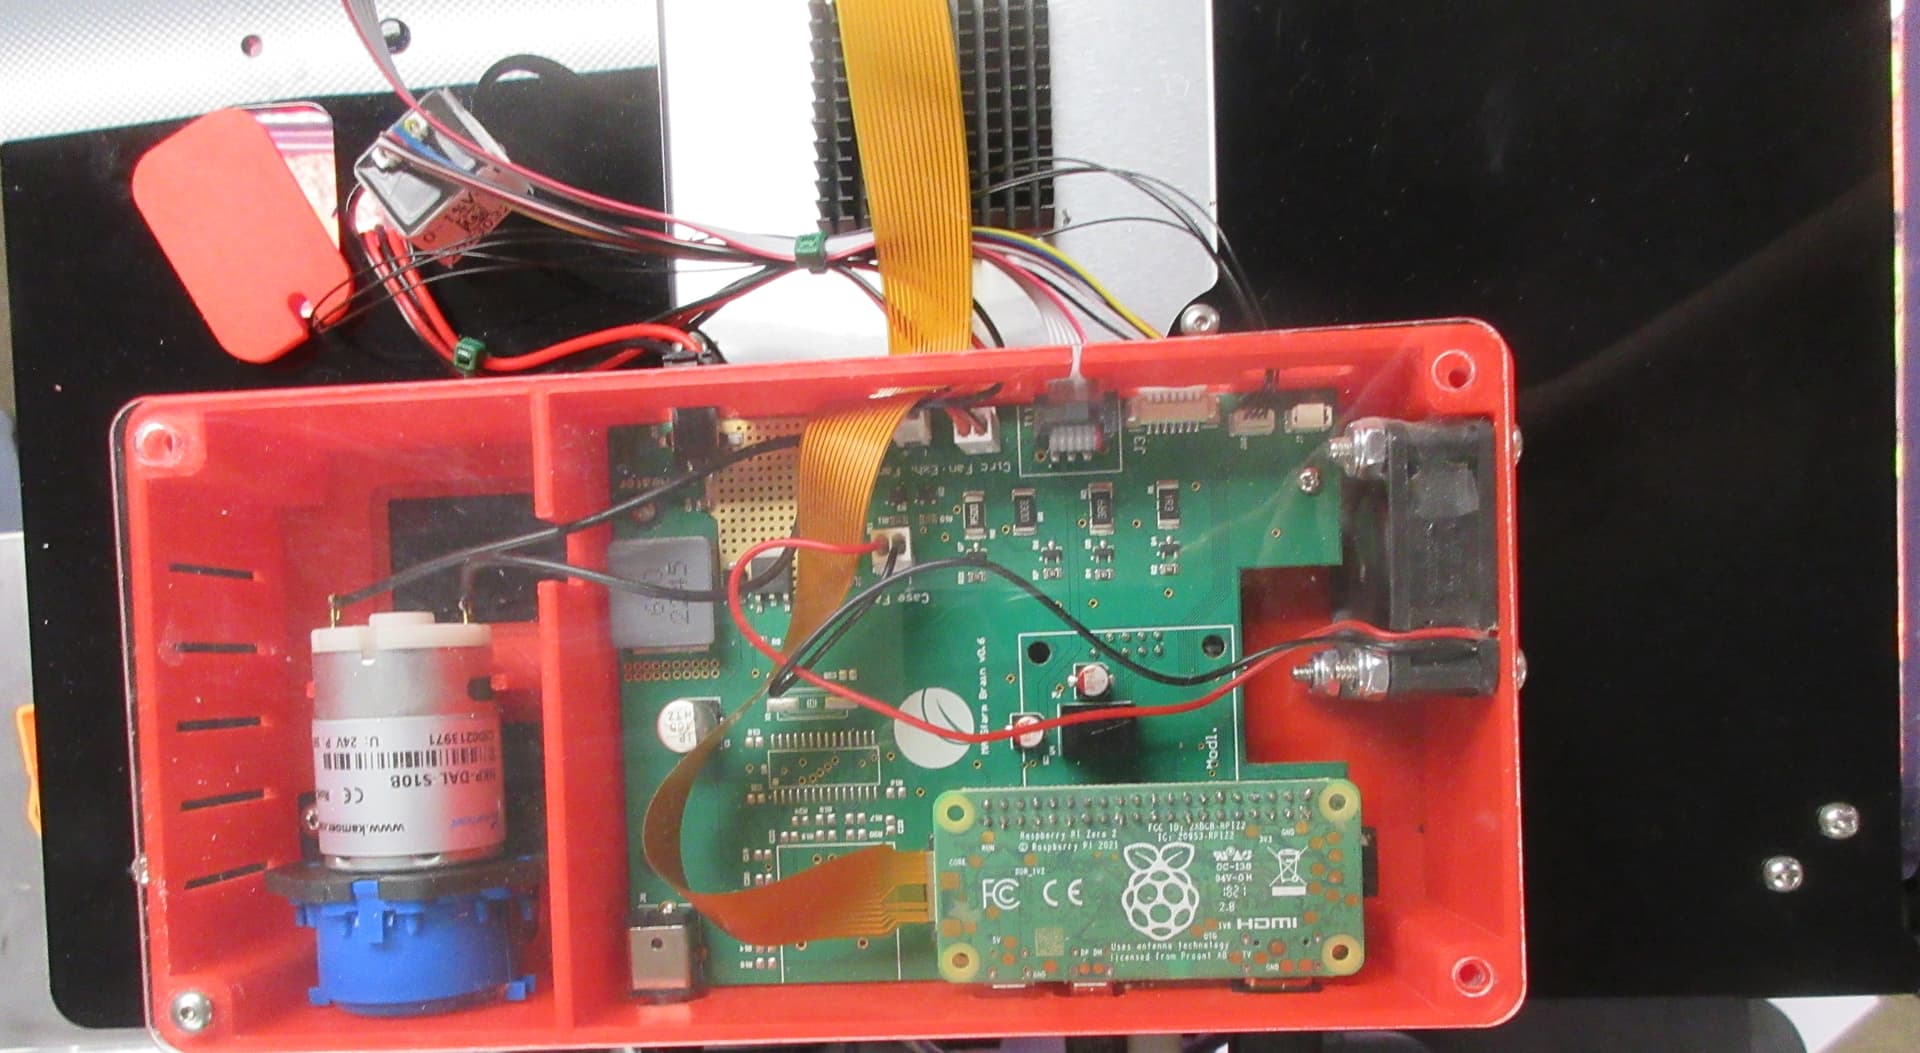
- Gently pull the Raspberry Pi up - there are long pins that insert into the board below. Be careful not to remove the camera cable, which is located at the opposite end from the SD card. Fun fact: we install the Raspberry Pi ‘upside-down’ onto the top of the MV1 circuit board.

- Remove the SD card which is currently installed in your MV1. It would be wise to tape this to a piece of paper and label it ‘old SD card for [serial_number], removed on [date]’ and put it somewhere safe.
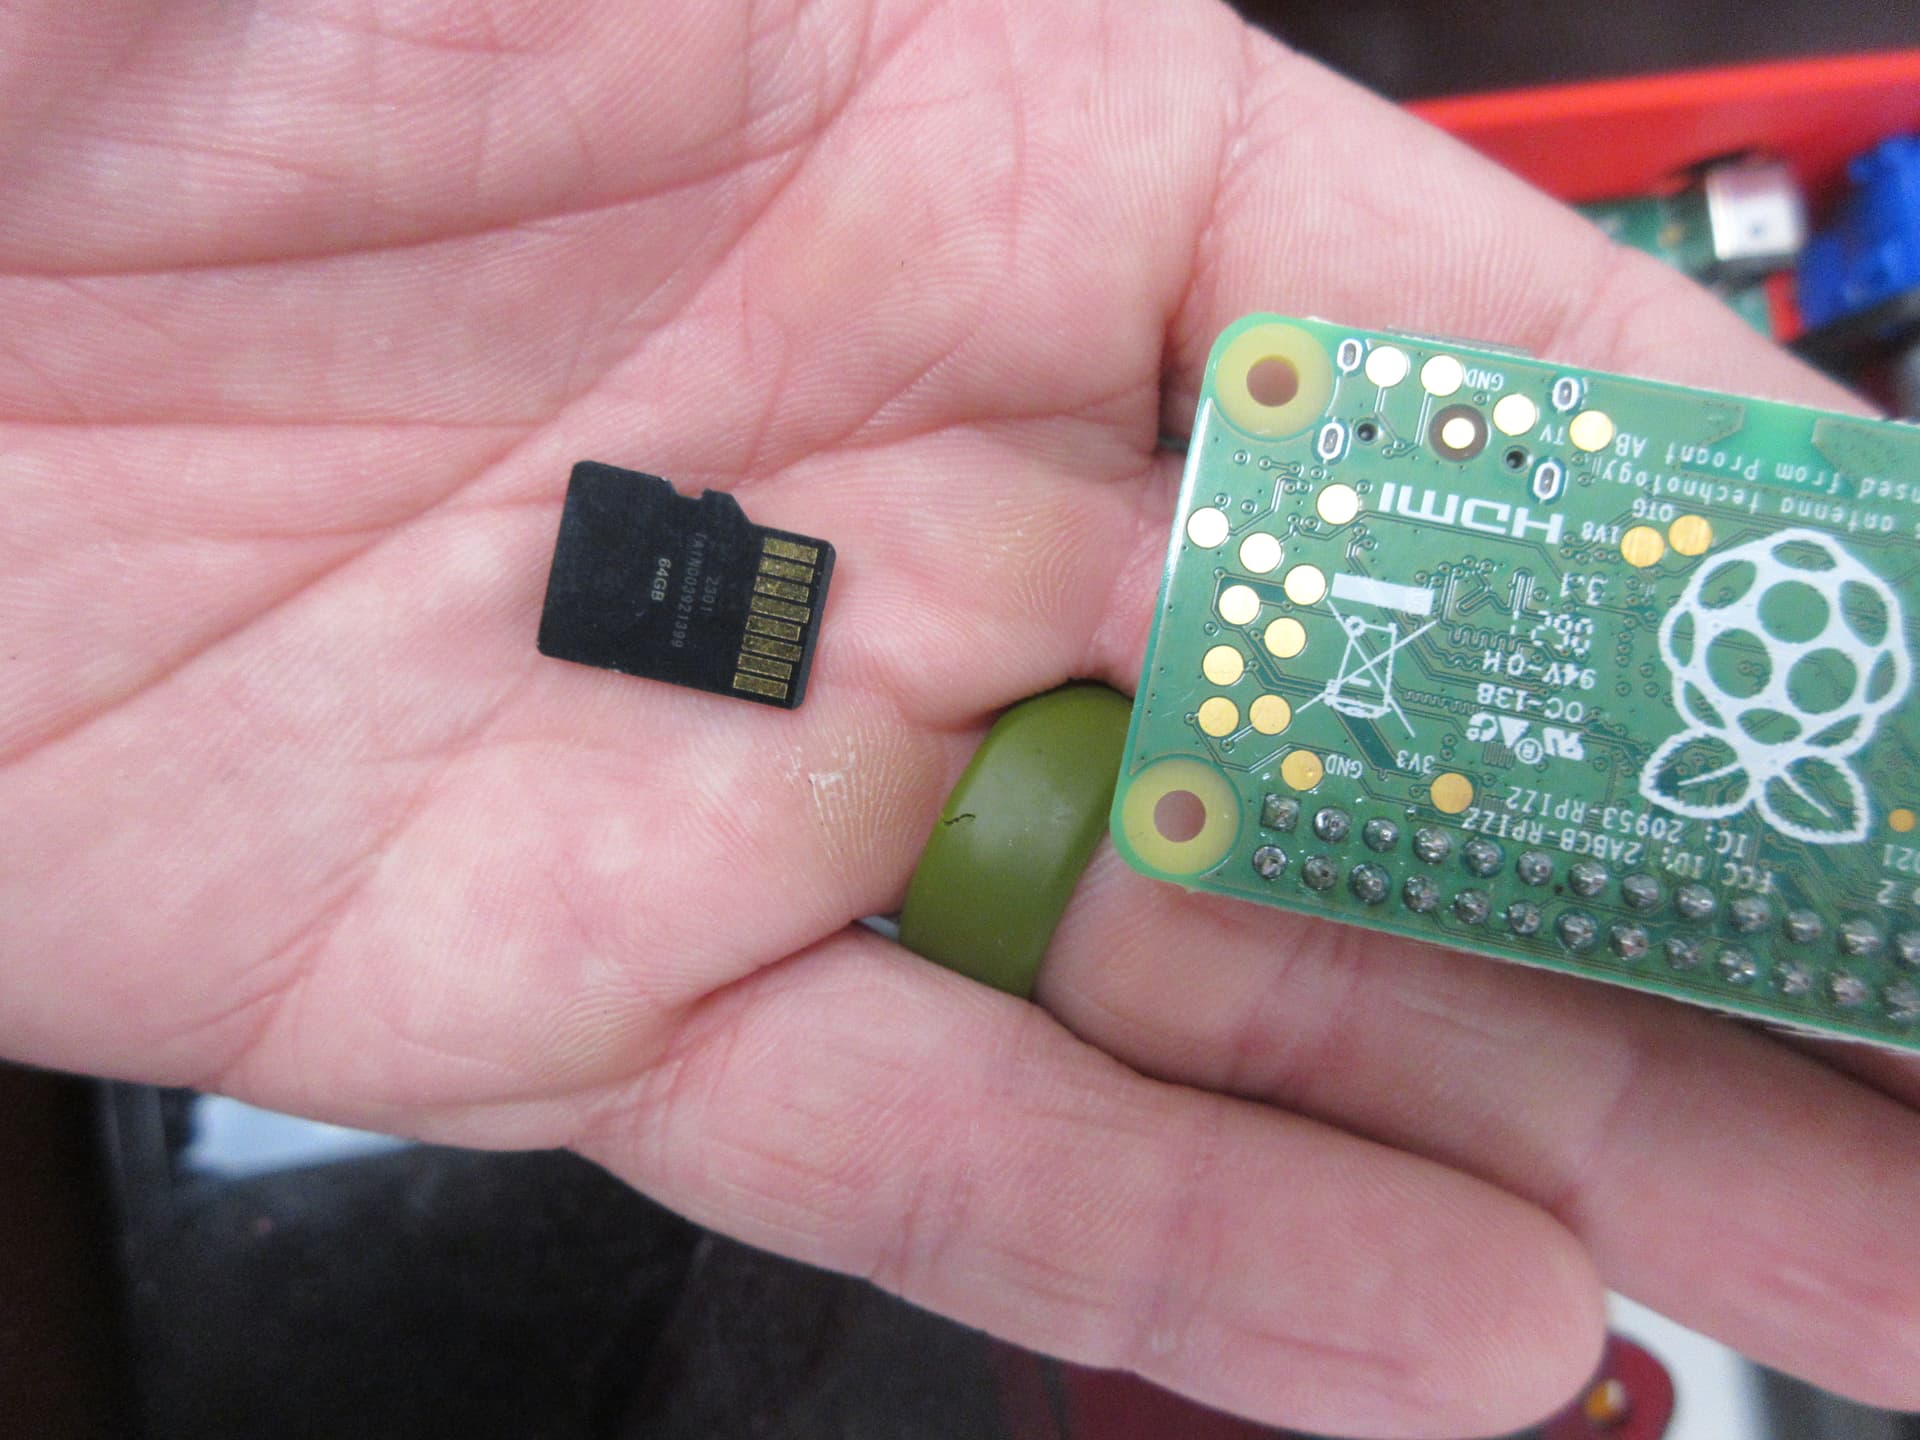
- Now put the new SD card sent to you by MARSfarm into the Raspberry Pi.

- Re-install the Raspberry Pi onto the MV1 circuit board. Be careful to line up the pins before pushing down on the Pi. This may require some force, so be mindful not to bend the pins - which will happen if they aren’t lined up.


- Re-install the screws and plug in the power supply.
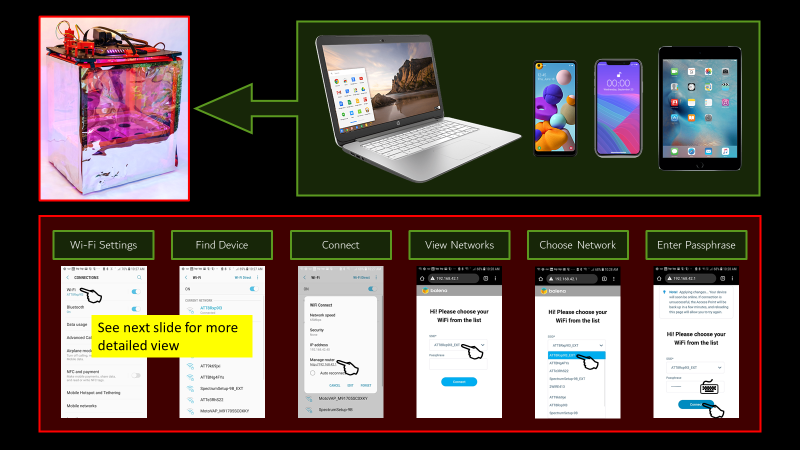
@jeremy.hall if you want to try using a Wi-Fi connection, here’s the complete instructions:
How to connect to WiFi:
- Unplug the Raspberry Pi for 10 seconds and plug it back in to reset the Pi.
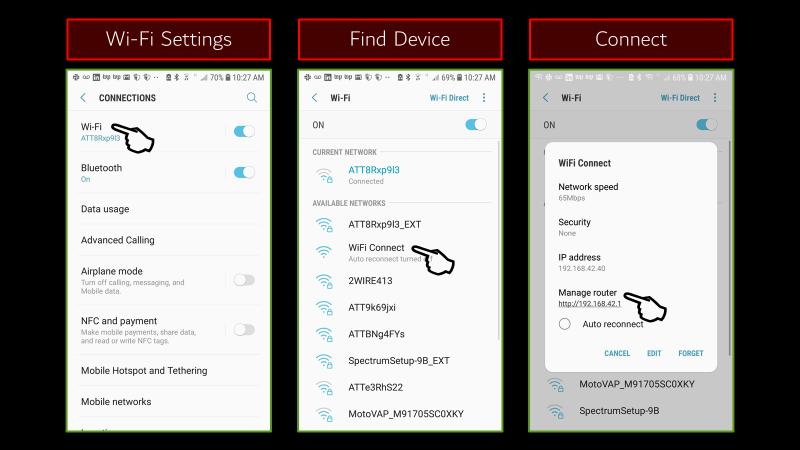
- On a separate device (phone or laptop), look through the list of Wi-Fi networks around you for one called “Wi-Fi connect” and click to join it.
- Use a web browser like Google Chrome (depending on your device, this may happen automatically) to access the URL “http://192.168.42.1/”, which is the IP for network configuration on the local “Wi-Fi Connect” network being hosted by your Raspberry Pi.
- Click on the little down arrow to the right of the upper box to see a list of all available networks around you.
- Select the network you want the MARSfarm to use going forward.
- Enter the “Passphrase” (fancy word for password) and then click “connect”.
- Wait about 1 minute (your page will probably refresh) after entering the password before proceeding to the next step.
- On your separate device, look again in your list of networks for “Wi-Fi connect”, if you still see it, repeat steps 1-7 and double-check your password.
- If you still get the same result, please email peter@marsfarm.com and leave a message describing what you are experiencing.
This is only true if the Wi-Fi network you connect to does not change passwords.
The most robust way to connect your device, and keep it connected, is to use an ethernet cable and plug it into the wall.
If you don’t have the option to use Ethernet, I would recommend using the faculty network and not a guest/student network as those tend to change passwords a lot more often.

OK, so we have tried this with a macbook, imac, 4 iphones, and 2 samsungs and we still cannot get to even see the wifi connect network on our wifi networks to choose.
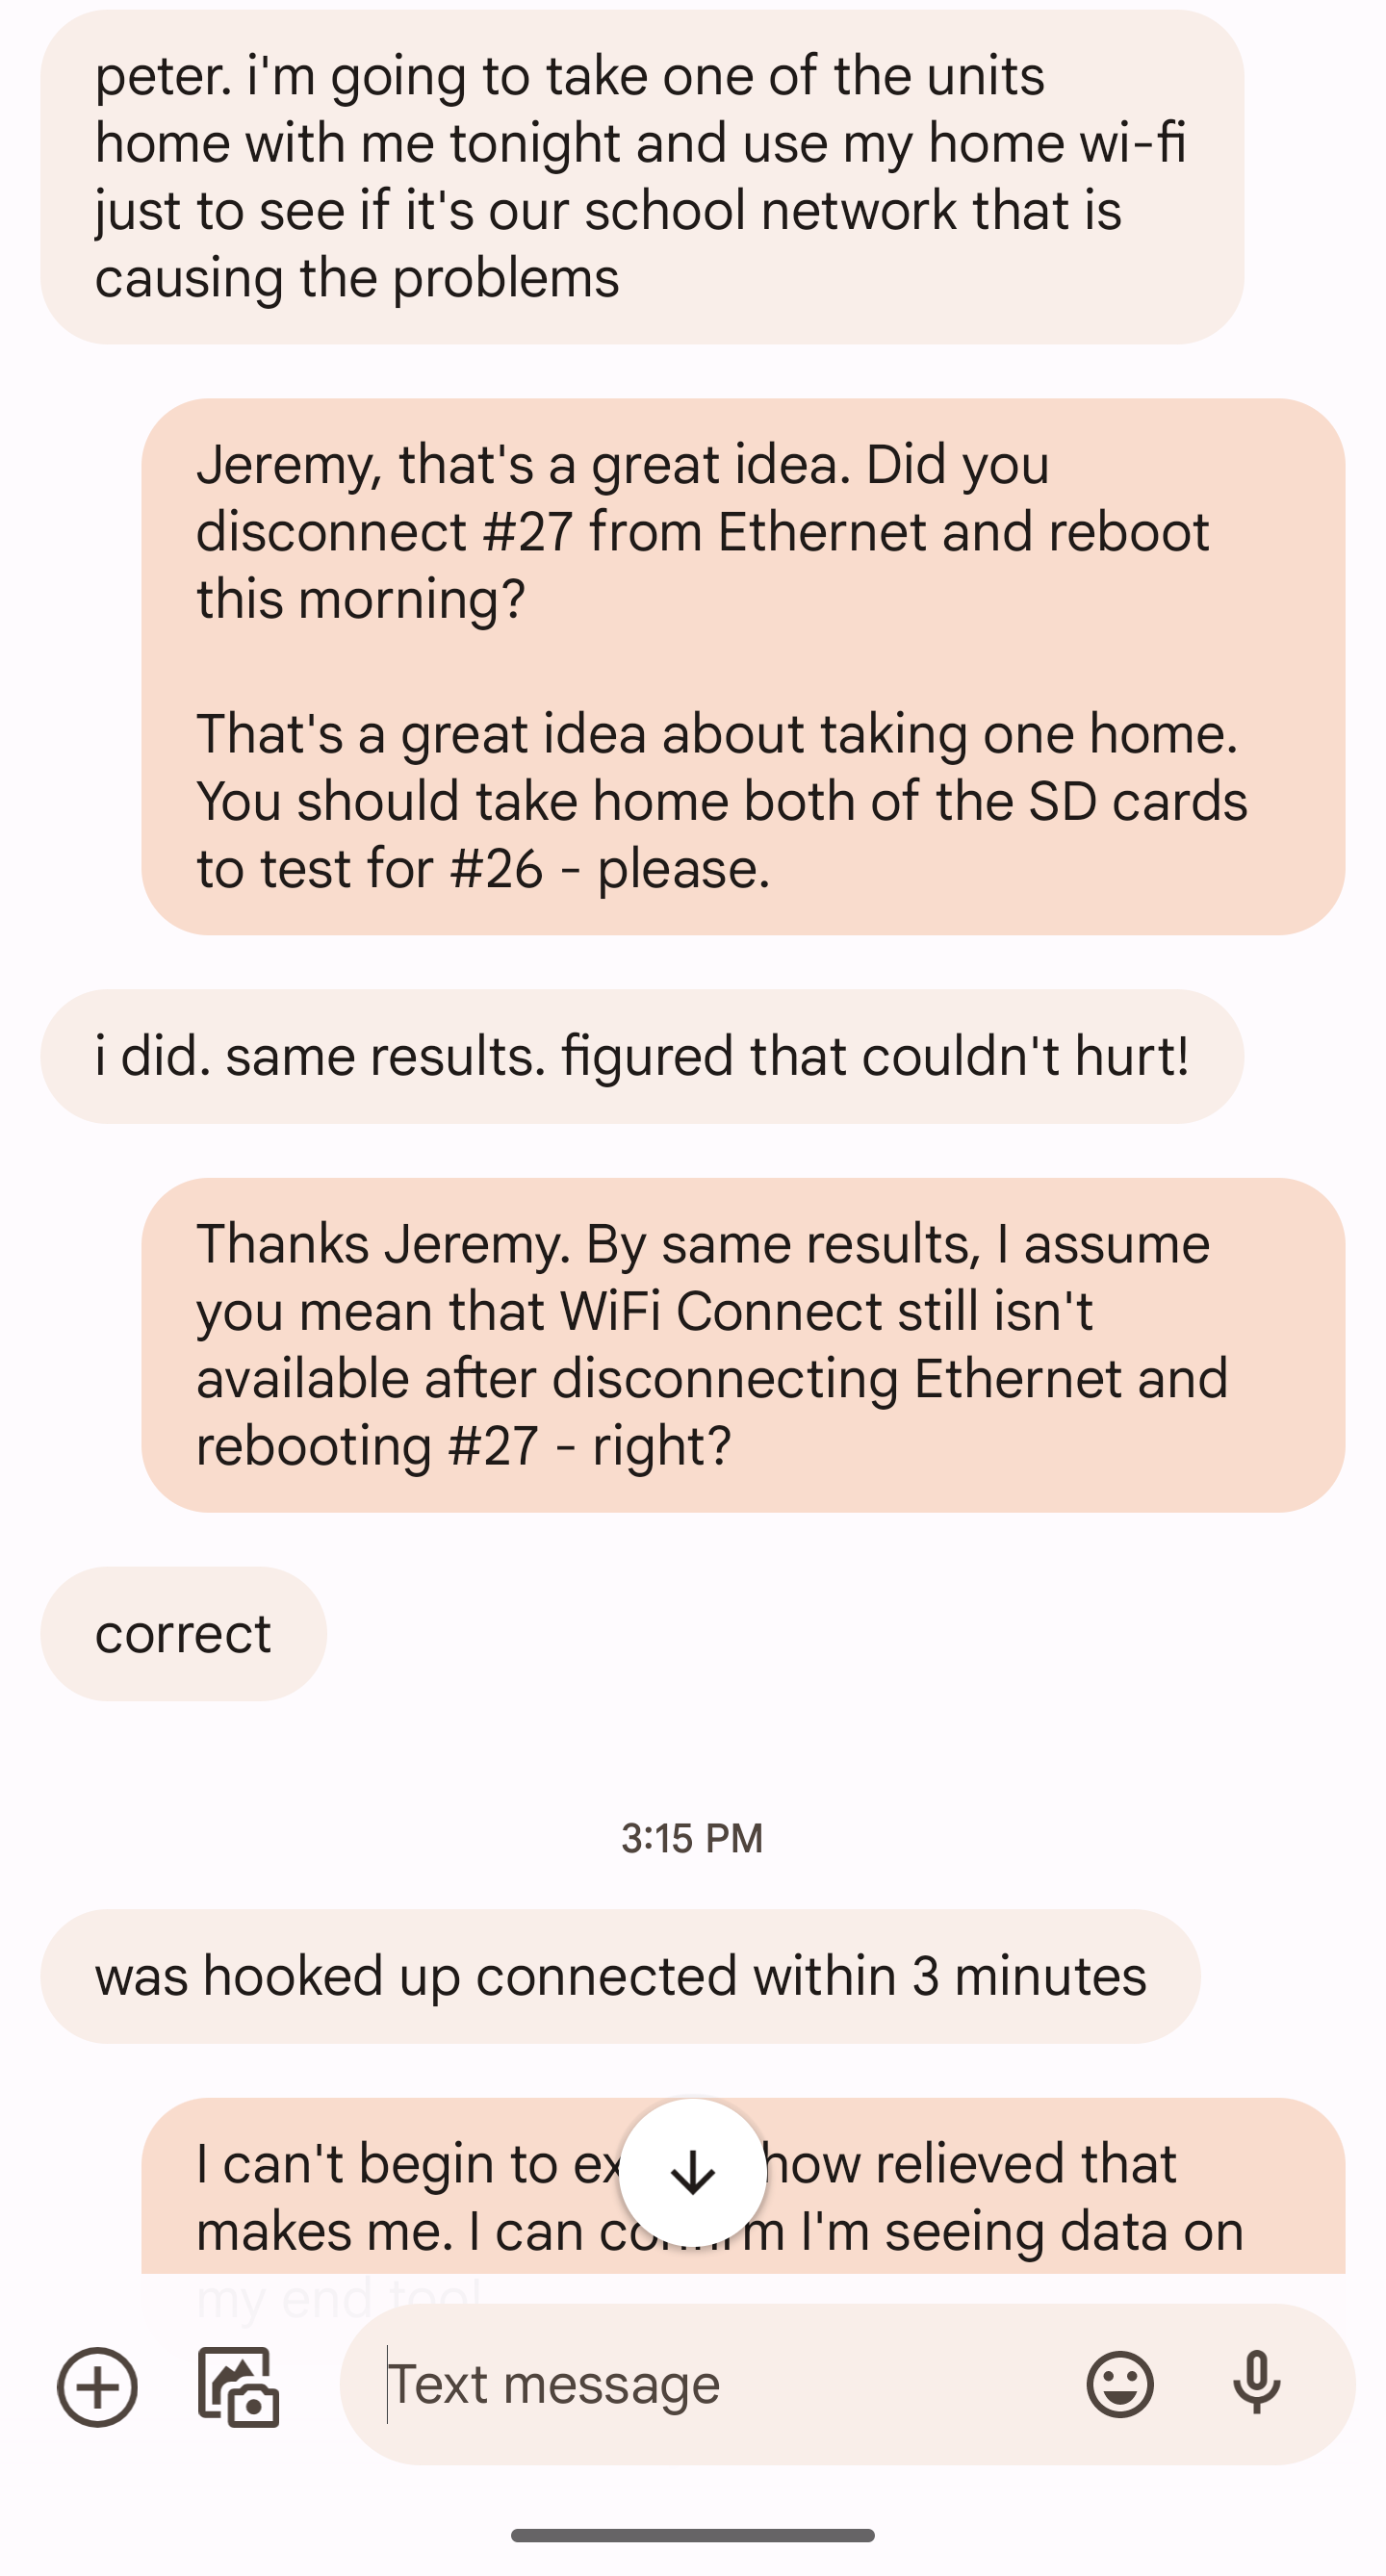
Shortly after that post, @jeremy.hall texted me this:

However, despite completing ‘WiFi Connect’ process (entering in network, password) there was still no data being sent from the device. I know that you did several reboots - each of which should have caused the ‘WiFi Connect’ network to reappear again (it will always create that network for you to join and provide credentials if it is unable to reach google.com) - because it WAS showing up, but is now NOT showing up - that tells me you successfully entered credentials. It’s a simple fact - if the device can’t get to Google, you will see ‘WiFi Connect’ as a network on your phone.
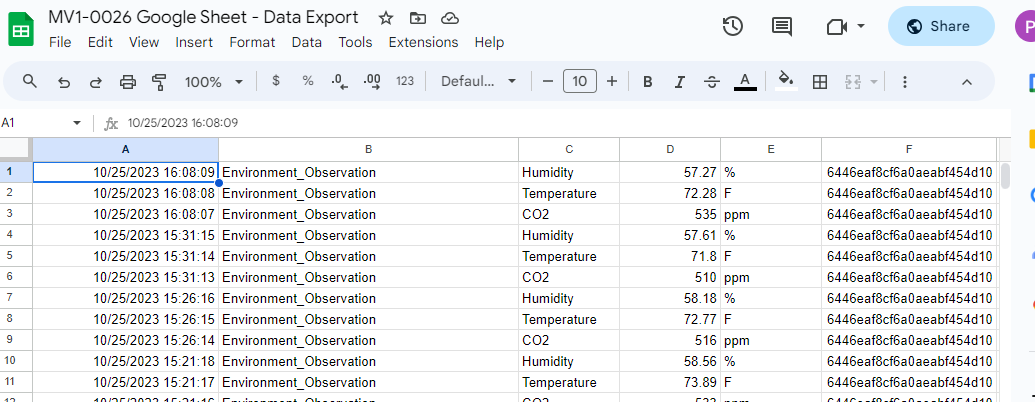
Then today, @jeremy.hall took MV1-0026 home and in 3 minutes was connected to WiFi successfully.
Data (finally)

Next Steps:
- Learn more about the IT department’s policy on IoT devices.
- Ask @jeremy.hall’s school to find #26 on their network and assign it a static IP address. Then they need to assign it to an IoT group or create custom rules that allow for the device to communicate inbound/outbound with this endpoint
http://a28ud61a8gem1b-ats.iot.us-east-2.amazonaws.com/via port 443.
Hi Jeremy, I received the card on Monday. However the one I received says Kingston and not Micro Center. Can you verify it is the correct card? I have not installed yet.
Best,
Surendra
1 Like
Hi Surendra, I’ll double check tomorrow to confirm but I am 99% sure it said microcenter
This is my fault - honestly, I thought I had edited my post already. Initially I was super confident about the type but then Drew informed me that I was wrong. It’s possible that yours may even be different.
Regardless of the brand, the card we sent @Surendra is for MV1-0020.

P.S. Jeremy got MV1-0026 online successfully using the strawberry firmware. @cregini did last week too - and his school was using a pretty sophisticated authentication process.
First, he took it home and validated that it would work in a ‘normal’ network. Then he dropped it off with his IT department and they used the WiFi Connect process to get it on their network. Once that was done, he’s been able to send data to the Google Sheet and the MARSfarm backend. This means he’s got images/charts displaying in the web app.
The one other thing we’ve discovered about running the ‘Strawberry’ firmware is that you need to be using the ‘development’ web application to send a trial. We will be adding this to the ‘production’ version of the web app within a week but until then please send trials (or if you want to just test out the other features like ‘all data’ views of charts) via the ‘development’ version of the web app available at this URL: https://mv1-dev.herokuapp.com/
@jodlowskik FYI - to help troubleshoot ethernet connectivity problems check the two LED indicator lights on the side of your MV1.
FYI @jodlowskik - please use this to troubleshoot your ethernet connection.
I am trying to connect via the ethernet, our school is changing up the WiFi so I thought this might be easier, so far it is not.
I am also having trouble seeing the lights for the ethernet. I see a greenlight I just do not see it right next tot he plug, I am looking from above.
I may have to bite the bullet and talk to the IT department.
I have 0091 plugged in.
1 Like