How To Troubleshoot the Growing Beyond Earth LED/Controller
-This short guide will cover how to check for most of the problems we see pop up with both the FG.V2 and FG.V3 LED. I’ll also talk about how to safely fix some of them.
-If any of these are helpful or work for you, please post about it below. We want to know what the most common problems with the hardware are so we can work to fix them!
Step 1: UNPLUG THE DRIVER FROM THE WALL!!!
Any inspection or operation dealing with wiring can be dangerous. Furthermore, if you have ANY questions about safety, please email us directly. We will work with you to fix any problem in the safest way possible.
Step 2: Check the wiring on the LED
FG.V2 LED

This is an example of what color of wire should be plugged into each terminal for the FG.V2 LED. Notice that the “COM1” Yellow wire is the common grounding line for each color.
FG.V3 LED
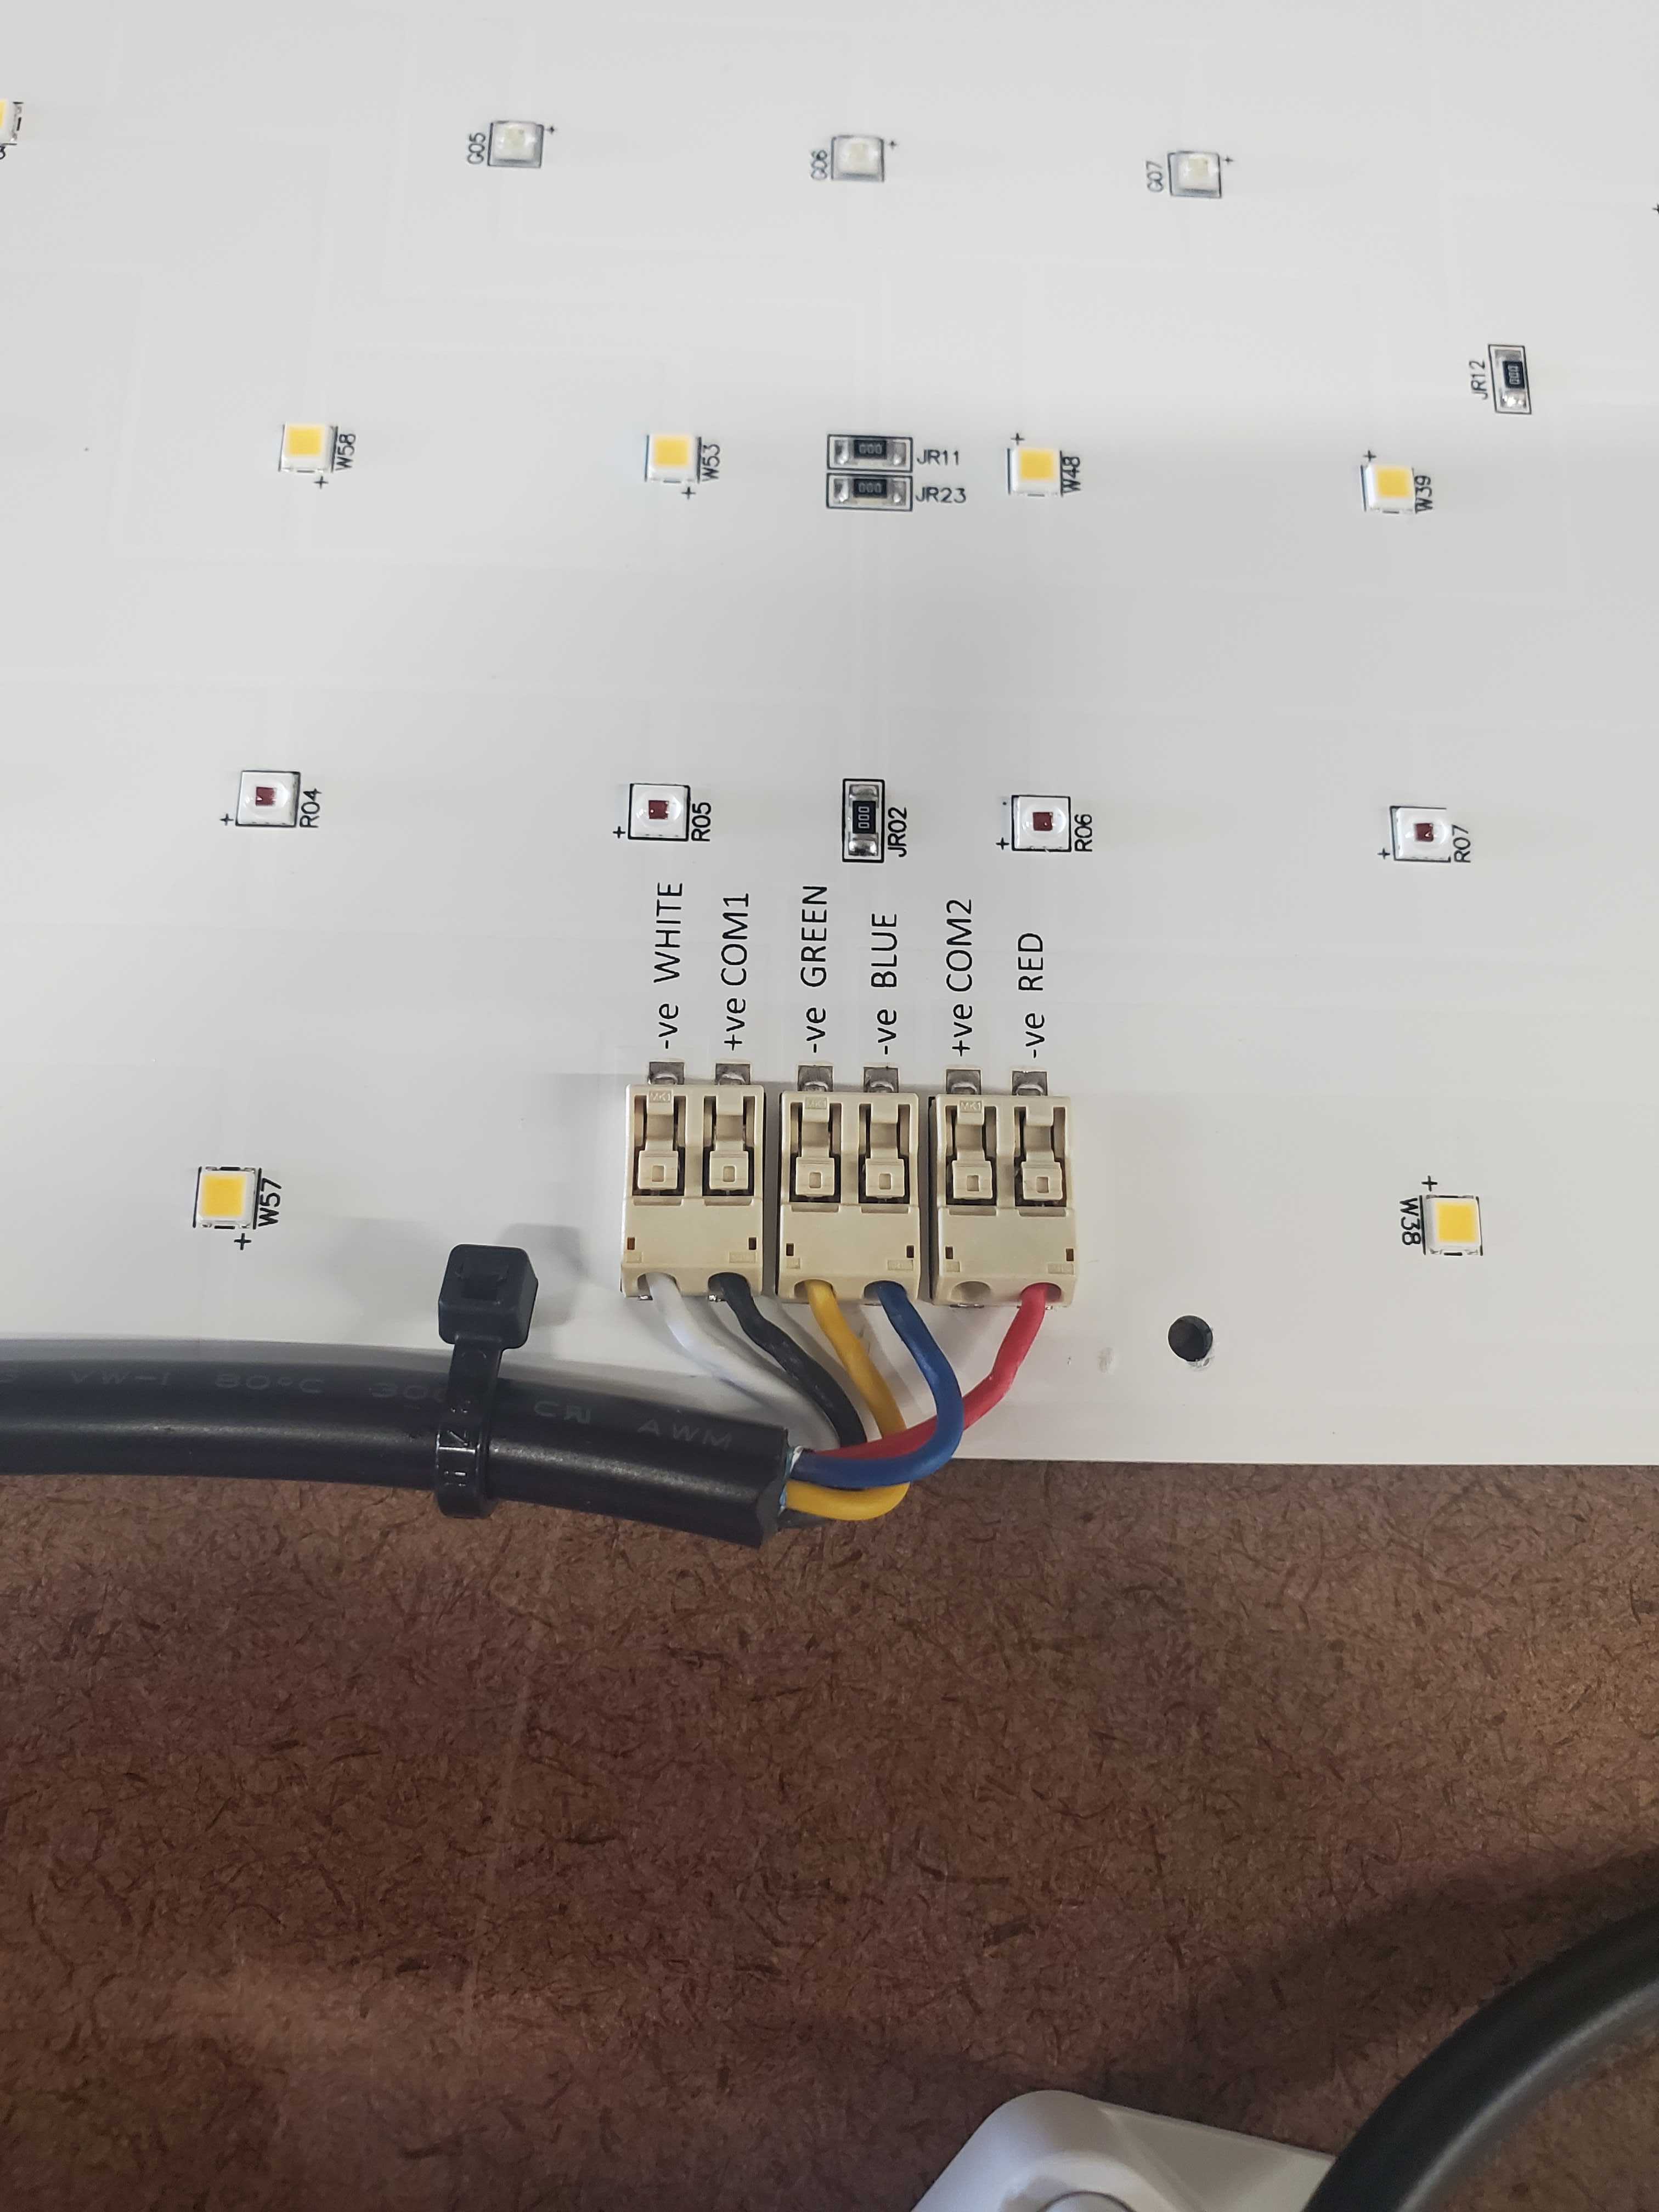
This is an example of what color of wire should be plugged into each terminal for the FG.V3 LED.
Notice that the “COM1” Black wire is the common grounding line for each color.
- If any specific colors are flickering, but the other colors are functional, check to see if the wire for the problem color is properly plugged in.
- If you are seeing flickering or other problems on ALL color channels, check the “COM1” wire.
- If colors sometimes work, but most of the time the colors flicker madly and the controller is giving an error, make sure that the “COM1” line has the proper color of wire inserted into it!
Note that the terminals on the LED work by gently depressing the area circled below with a flathead screwdriver. The plastic on these terminals is soft, and can be damaged by excessive force or the wrong tool. Depressing this area will allow the wire to be pulled out.
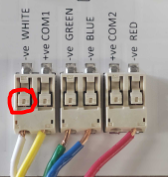
To reinstall a wire, use smooth pliers to press the wire in until it is held firm.
If the wires are in the proper locations and firmly secured, but you’re still experiencing issues, proceed to Step 2.
Step 2: Check the Controller Output
To check the output of the controller for issues, first use a Philips screwdriver to remove the white plastic cover.
FG.V2 Controller Output

FG.V3 Controller Output

- Note that the “V+” terminal should have the same color of wire installed that goes to the “COM1” terminal on the LED.
- Follow the same logic as used to troubleshoot the LED; ensure all wires are in the correct terminal, and firmly installed.
- These are screw terminals, simply use a flathead screwdriver to release or clamp down on the wires
- If any stray “strands” of wire are exposed, ensure that they get tucked into their proper terminal to avoid an electrical short.
- Replace the white plastic cover
If everything physically looks good after Step 1 and Step 2, you are likely having a problem with the entire LED not turning on. Proceed to Step 3.
Step 3: Check the Controller Input
To check the input of the controller for issues, again use a Philips screwdriver to remove the white plastic cover.
FG.V2 Controller Input

Notice that the “DC-” wire has no sheathing, be very sure that no stray strands from either wire are able to touch the other. This can cause the device to break, as well as being a possible fire hazard.
FG.V3 Controller Input

As before, ensure that the proper wires are firmly installed into the proper terminal.
If this did not fix your problem, or if anything in the guide is not clear, please post below!