Current documentation for MARSfarm Version 1 (MV1)
Please add comments to the documents, or reply to this post with suggestions of how to improve!
Setting up the MV1
Instructions for how to assemble the MV1 A physical copy of this should already be in the large MV1 package
Glamour shots (courtesy of my brother, Gregg) of the MV1 fully assembled Use these photos to confirm your assembly (including the wicking irrigation system) is correct.
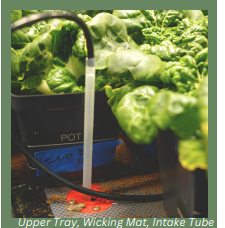
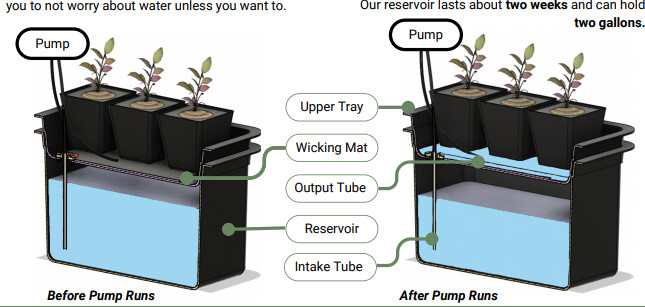
Instructions for setting up the irrigation system inside of your MV1 (small box):
Instructions for growing Bok Choy in the MV1
Connecting the MV1 to Wi-Fi to view data and send recipes
Printable instructions for setting up Wi-Fi
Link to login to the MARSfarm Web Application
If for any reason you cannot login, please notify @Drew immediately.
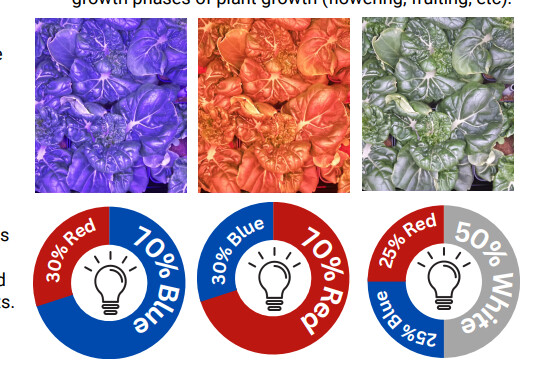
Explanation of ‘recipes’ and how they control MARSfarms.
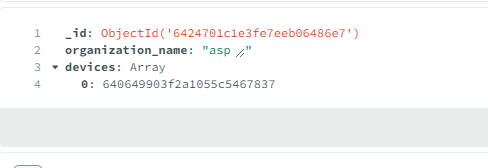
@speck_c Thanks for posting! Sorry that you couldn’t login today, the good news is that I think this is a quick fix! Please try to login again now, it should be fixed.
I was manually editing the organization domain name yesterday, so that I could test it from my own accounts using Google oAuth. Unfortunately, I made a foolish mistake when changing the “organization_name” field (ASP instead of APS) - oops. My fault for being careless editing production data - we’ll fix our process to not ever hard edit production “organization” records like this in the future.
OK, got things going, but the day numbers on the pictures seem a bit wonky. They’re going down, not up. Also, how do I start entering phenotypic data from the plant tab on the left hand side of the app? You preselected a trial for me, so do I need to do a new trial?
I will look into this…do you recognize all of the photos - or are some not even from your current trial?
You are correct because I created a trial for your device which did not contain any plants, to add phenotypic data you must create a new trial. Currently, the only way to add “plants” is immediately after creating a new trial. The link below is a video demo I just made to demonstrate how to create a new trial, add plants to it, and then add a phenotypic observation to those plants. Hopefully, this gets you started:
This is a copy of the “recipe” which I would recommend you select for the new trial. All of our recipes (and data in general) is stored using “JSON” formatting so that we can define objects with sub-objects. For example, a recipe contains the sub-object phase (germination), which contains the sub-object pump_amount. Inside of pump_amount there are two properties, start_time and setting - these define the time when the pump should run and for how long.
Only 1-2 pots seem to be getting water. Is there an ideal delivery hose placement or is the amount of water not sufficient to flood the tray to a level which gets water high enough to be taken in by each pot through the watering mat?
No, essentially the center of the tray is best - but that’s not very scientific. This would be great for your students (@speck_c) to test!
No, unless you’ve created a new trial since receiving your MV1, it’s probably only adding 80 ML of water (despite the trial name saying otherwise) - which isn’t enough to saturate the wicking mat when it is dry. It’s probably a good idea to go ahead and pour water on the wicking mat during setup to “prime” it - or soak it.
Problems with the irrigation system
Problem: Irrigation hose grows algae after ~50 days of use with nutrient water Long-term Solution: Hose will be made opaque in future versions to prevent biological growth Short-term Solution: Wrap the section of the hose that is exposed to light in electrical tape.
Problem: The water added in the default recipe (80 ML) is only reaching a few pots Long-term Solution: We’re testing methods of direct distribution to pots or connection of hose/tray Short-term Solution: Create a new trial using the “MV1_Bok_Choy” recipe for your device OR the wicking mat could be removed to reduce the speed of absorption - so the water reaches more pots.
All recipes have been updated to provide 320 ML of water by default.
The speed of pump is too slow to quickly “flood” the tray when the wicking mat is dry, removing this helps it reach all pots.
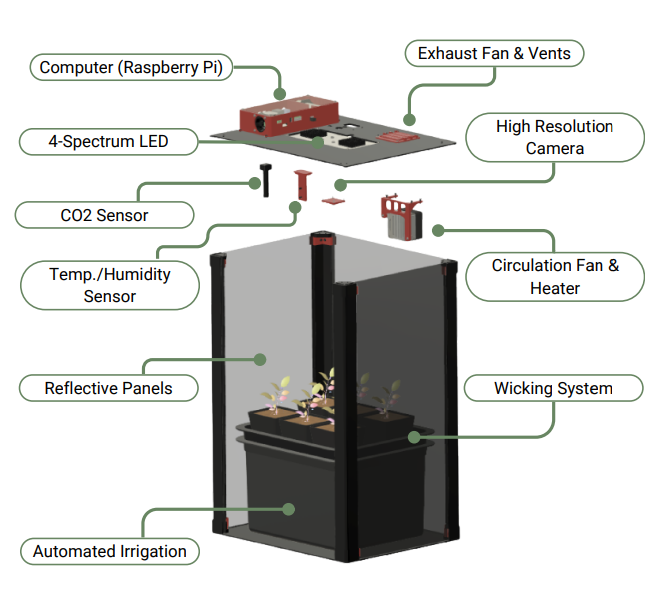
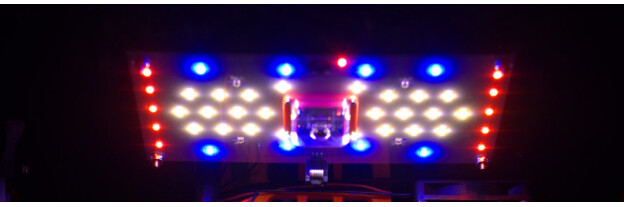
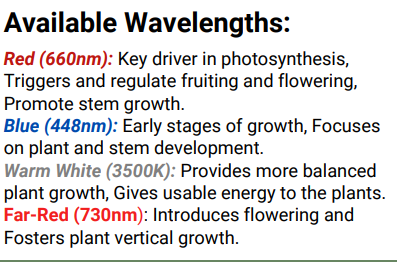
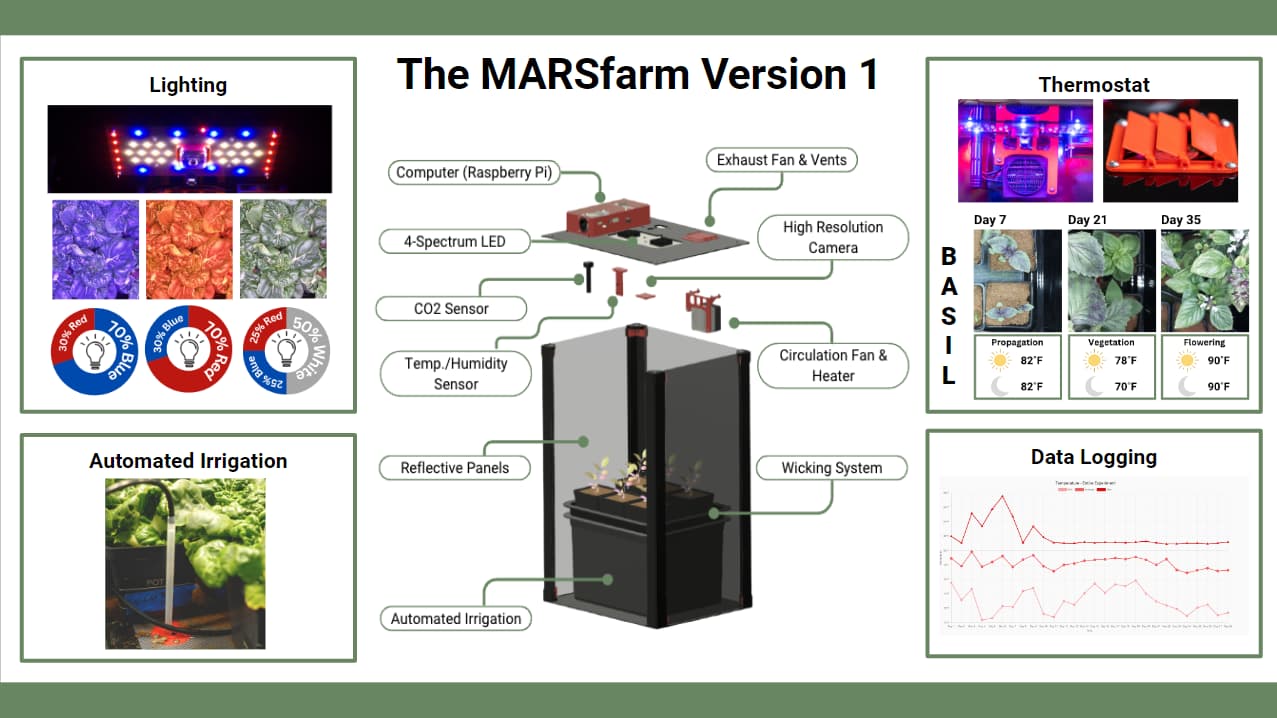
@cregini@speck_c@sforget@jodlowskik I know you mentioned that your students were taking an interest in how the MV1 works so I wanted to point you towards this document. We created a brochure over the summer and I’m not sure if you ever received one but this contains a lot of graphics you could use to talk about how the MV1 works.
I was recently delivering equipment to a university here in St. Louis and the professor couldn’t be there on the same day - so a different professor recorded this video of me demonstrating the setup. I figured I’d share it here for anyone else that is interested in a video walkthrough of the setup - each is about 4 minutes.
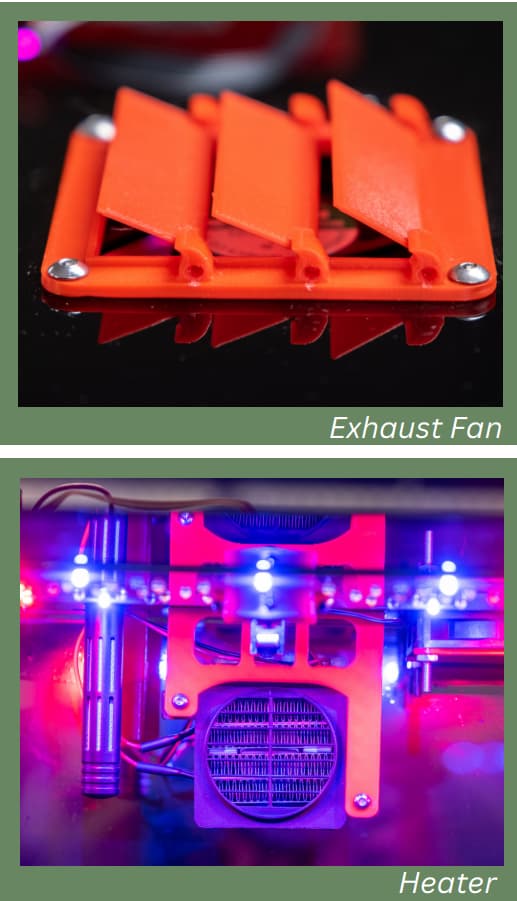
Setup of MV1 frame and top panel with electronics installed:
Setup of MV1 irrigation system and pots with bok choy seeds: