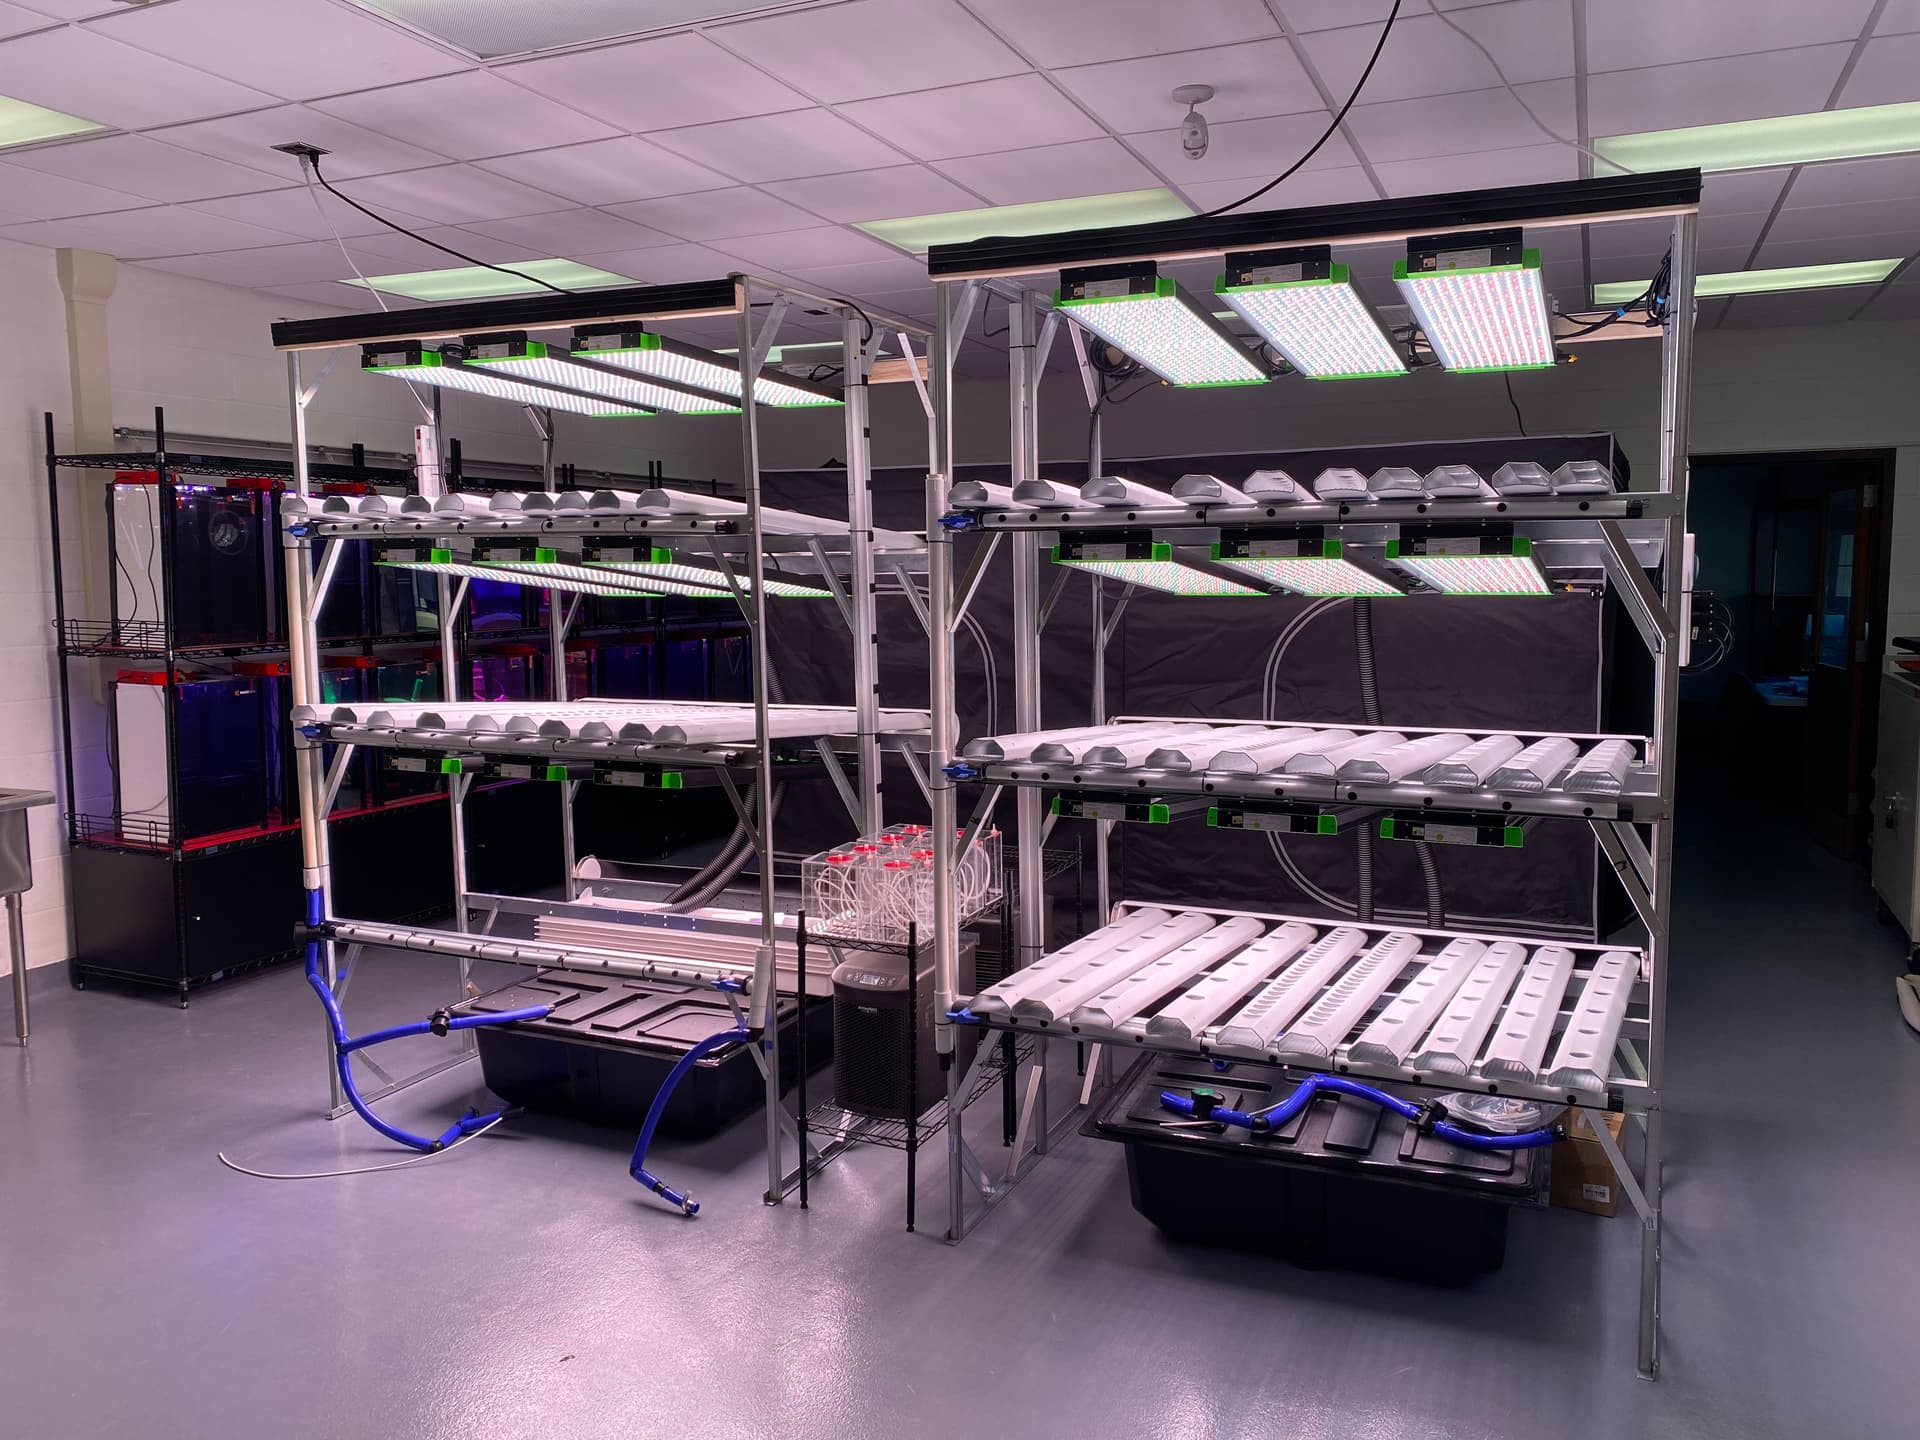
Recipes to Germinate 300+ Seedlings in our MV1s

We have been building out a new AgTech lab in an old science room at our high school. After some internal delays with getting utilities into the room, I was finally cleared to construct our growing systems. This includes 25 MV1s! Here are some pics to reference…


I have now been tasked with getting something growing in the room…by 5/3! So now it’s time to put the MV1s to the test. Germinate and grow 300+ transplantable seedlings to populate our main systems for a press event the district would like to have to kick off the space. I had asked @Peter for some advice and we thought it might be good to share this adventure for everyone to learn from.

2 Likes

This is awesome Chris! I love what you are trying to do with the MVs.

2 Likes

Thanks for sharing @cregini! These photos of your lab are pretty amazing - I can’t wait to see this full of plants!


italics indicate information was provided by Chris (via email)

The Plan is to germinate in the MV1s over the next couple of weeks while finishing the construction of these systems. I will then transplant from the MV1s into the larger systems to grow them out for 7-10 days before Island Harvest arrives. I will likely be seeding about 400 plants and dispersing them into the MV1s.

Equipment

  • 25 MV1s with space for 6 pots or 24 seedlings each
  • 10 FG.V1 GCKs with space for 6 pots or 24 seedlings each
  • I have two stacked NFT systems that each hold 150 plants.
  • I have one 5x10 tent with 12 bato bucket planting sites for the larger plants.
  • I have a second 4x4 tent with an additional 4 bato bucket sites.

Seeds

  • I am going to run 6 cherry tomatoes and 6 cucumbers in the batos.
  • [The lettuces include] Rex Butterhead, Skyphos Bibb, and Gladius Romaine.
    • Rex Butterhead (Lettuce): Germination: 2-4 days, Seedling: 7-14 days, Vegetative: 14-28 days, Maturation: 55-65 days total from seed to harvest
    • Skyphos Bibb (Lettuce): Germination: 2-4 days, Seedling: 7-14 days, Vegetative: 14-28 days, Maturation: 55-60 days total from seed to harvest
    • Gladious Romaine (Lettuce): Germination: 2-4 days, Seedling: 7-14 days, Vegetative: 21-28 days, Maturation: 60-70 days total from seed to harvest

Peter’s recommendations

It sounds like you have several different goals for the lab this Spring. I’ll do my best to answer them separately. I’m preparing for a conference on April 11th, where showcasing the capabilities of our MV1 units is a priority. I plan to start various seeds today and ‘follow along’ with the same recipes in 15 MV1s at MARSfarm HQ. I’ve organized a bunch of (see table below), aiming to create effective recipes for that first stage of growth. These germination recipes are public; I intend for us (and anyone else!) to both use them. This approach tests the MV1s’ capabilities but also encourages a community of shared learning and experimentation.

Spreadsheet showing the configuration of @cregini 25 MV1s:

Temp settings used for germination recipes

Instructions for starting trials in 25 MV1s

1. Producing lettuce using NFT systems

  • I created two recipes for germinating any lettuce in the MV1.
    • The first is ‘Lettuce Germination (100 ML)’
    • The only difference is that one provides 100 ML of water daily, and the other provides 200 ML.
    • I would recommend starting with 100 ML - likely that is plenty, I just created the second so you can increase if necessary.
  • Sometime in the next 7-14 days (really depends on germination) you can assign a second recipe to each unit - advancing it to a ‘seedling’ phase with slightly cooler temperatures and more water titled ‘Lettuce Seedlings (160 ML)’.

2. Producing tomatoes, cucumbers (peppers?) in bato bucket system

  • Recipes for germination (separate recipe for seedling phase)
    • Cucumber Germination (100 ML)
    • Tomato Germination (100 ML)
  • When I post the seedling recipe (next week), I will provide recommendations for how to add fertilizer to the lower reservoir and adjust the spreadsheet above accordingly.

3. Demonstrating MV1s as an experimentation platform by creating a sample dataset

  • I am going to slightly modify six existing recipes to match the settings used in this research paper titled ‘Influence of Day and Night Temperature and Radiation Intensity on Growth, Quality, and Economics of Indoor Green Butterhead ‘Rex’ Lettuce…’.
    • My goal is to have you replicate that experiment using six of the MV1s.
    • To start these trials though, you’ll use the same
    • Here are the recipes you’ll end up testing: DLI: 30 (240ML), DLI: 21 (240ML)DLI: 17 (240ML), DLI: 30 (240ML, 86F), DLI: 21 (240ML, 86F), DLI: 17 (240ML 86F), DLI: 17 (240ML)
  • My goal is that by 5/3 you will have grown plants that demonstrate tipburn and heat stress on the primary variety of lettuce ‘Rex’ that you’re growing at a larger scale.
    • Those are two things you’ll need to be don’t he lookout for in larger systems as well.
  • Depending on what ratio of varieties you actually planted, it might make sense to seeds from two or even all three of the lettuce cultivars (2 pots of each per unit in that situation) for this experiment.
    • The outcome will show if one of them does better in high light/high heat situations than the others.

Hopefully, that helps! I’m running a bit behind but will be sending the recipes myself for germination later today. I don’t quite have them loaded yet (publicly) but will 100% have them up by midnight so you (@cregini) can assign the germination recipes to every device possible in the AM on Tuesday (03.25.24).

Edit: Link to forum thread with details/links to germination recipes:

@Peter this is amazing. I will try to keep a running log of our progress with this experiment on this thread. Today I had 15 students and 4 educators visiting our lab from Wales. It is part of an educational exchange program where they visit other countries to bring back pedagogical and cultural experiences to their schools at home. The students sewed 400 seeds (200 Rex Butterhead Lettuce and 200 Skyphos Bibb Lettuce) into 1.5" Growdan rockwool cubes. They will have helped to create our first crops in the MV1s. They are also really excited to be able to view the progress of their plants using the Web App so that they can learn about how they will be grown and eventually used. They will be observing pictures of the plants while comparing them against the different recipes we subject them to. They will collect data to lead science lessons they will conduct upon returning home and eventually spark their own hydroponics upstart. This is a perfect use case for how the MV1 can leverage experimentation at a distance! Here is the group in action.

1 Like

We have officially started our germination recipes in 24 MV1 units. The breakdown is as follows:

As of the end of this post we will not be back in the lab for one week and we are going to see how our recipes come along.

There was some concern about the 100mL treatment not being enough for the growing media we had selected. Given the absorptive ability of both the rockwools and wicking mats, we decided to charge each of the beds with 250 mL to ensure saturation. Any standing water will serve to raise the humidity inside the units which should help to promote germination.

I decided to place the output tubing of the pumps in the center of the rockwool and container fields. The hope it to prevent any vibrations from causing the tubing to fall out of the watering tray. In the past we have taped it against the rim of the tray.

I have future plans to modify this output tube slightly with Y and 4-way barb fittings that would allow us to lay an output manifold flat on the bottom of the tray and dispense water evenly for applications like these.

@Drew did a fantastic job with the Trial Manager. It made assigning recipes to 24 MV1s super convenient.

The Device Manager is also great because I can get a snapshot of the conditions inside the MV1, verify if it is online, and have a look in on the condition of the medium itself.

If I notice that things are looking dry I can simply update the trial with a new recipe to boost the water. Coupled with the recipe manager and the GUI I stitched together in THIS POST, I can modify just about anything on the fly. Super useful when you’re out of the lab for a week! Hopefully my next update will show “something green”! :grinning:

1 Like

Wow Chris - this is pretty awesome to see. Please keep sharing photos over the next few weeks - I’ll be keeping an eye on the seedlings too while you’re away.

P.S. If anyone is interested in using the same germination recipes that Chris is using, they’re available to everyone for selection now through the user interface:

If there are a few students in particular that are really interested, or a spokesperson for the organization, I’d like to encourage them to join the community forums. Here’s a link you can send them that they can use to create a new account: MARSfarm Community If they create a new post and are interested in touring a hydroponics facility, I can try to connect them with a plant guru in the UK named ‘Glyn Stephens’. He works for Jones Food Company, a pretty large / seemingly successful vertical farm. Here’s an article with more information about Glyn: Gloucestershire vertical farm is one of UK's 'most advanced'

I wonder if they would be interested in building a $50 countertop greenhouse so they can at least germinate seedlings in their classroom. I just added a reply to that thread with some links to source the LED (most difficult to source part) for that project in the UK as well.

Boy was I wrong about the amount of water necessary - 100 ML was not enough! I hadn’t accounted for the fact that @cregini would have 20-40 rockwool cubes in some of his units and that he was using the wicking mat (a part of the irrigation system we’re discontinuing) which required more water. When we noticed on day 7 that the media in some of his units was almost completely dry - I created a ‘Rockwool Seedlings (78F, 240ML, 1000ML Days 1-8L)’ recipe that would increase the daily water from 100 to 240 ML daily. Furthermore, because it’s difficult to ‘overwater’ during germination - I decided to have this recipe provide 1000 ML of water (just in case) for those first 8 days.

Analysis of images / pump data from @cregini unit MV1-0056

Many of the rockwool cubes are lighter in color, indicating that they’re getting dry

After 1000ML ‘flood’ on day 8 the rockwool is saturated (darker) and there is even standing water

The 320ML of water daily has been more than enough to keep the rockwool saturated

Chart of pump actuation doses - indicating the total amount of water (in ML) added daily

|690x175](upload://rmBaTUjJD3QzVxVSAKOM4LCoxpF.png)

Analysis of MV1-0058 and MV1-0049

It looks like water is still not being added in these two units.


Is it possible that the pump tubes are installed incorrectly? See this post by @steven over the summer indicating how to check if it’s correctly connected - @Drew may have more details if you’ve got questions.

Conclusions

  • I can already see that in your tomatoes at least there are roots growing out of the rockwool
  • If you intend to keep them in these systems much longer, then I would suggest you begin to add nutrients and also remove the wicking mats to prevent damaging the roots when removed later.
  • I think that having the 320ML of water daily has been sufficient to keep the trays flooded - which is good because these are being transplanted into NFT/Bato Bucket systems.
  • If you want to try to to use less water, feel free to switch your recipe to be the ‘Lettuce Seedlings (160ML)’ or ‘Lettuce Seedlings (240ML)’ using the Trial Manager page. I don’t think this is necessary though.
  • Please go ahead and assign recipes to MV1-0049-0055 that will increase the DLI/Temp (as indicated in the spreadsheet) whenever you are able. If you don’t get a chance by end of the week I’ll go ahead and do this for you @cregini.

Screenshot of ‘Trial Manager’ page showing the three new lettuce recipes


Tomato roots

Good catch on the roots in the units holding tomatoes @Peter . They were just beginning to root out. They came out pretty easily and I’ve since removed the wicking mats and now have them sitting directly in the trays. I agree with the idea of fading them altogether. We had found with some of our hydroponic treatments that they tend to harbor quite a bit of algae build up once nutrients are brought into the picture and made them more of a consumable from one crop to the next. In retrospect that was more of an error on my part considering we were using flood and drain treatments.

The cucumbers were a bit of a different story. It’s been my experience that vegetation takes off pretty quickly after germination and their roots were no different. They had a pretty significant root mat under the wicking mat.

I did the best I could to produce as little root damage as possible, and they too are now on the tray. I will keep an eye on them to see how they fare with having all of that root mass removed.

I also agree about getting these two crops started on nutrients. I suspect it will lead to quite a bit of algae growth on the rock wools. Will this be problematic? One of the students suggested foiling the cubes to prevent light access. Is this overkill?

Finally, I inspected units 49 and 58 for the pump issue. 58 did indeed come with its tubes crossed and I have swapped that out. Unfortunately we lost the seedlings in that unit early on. 49 looks ok. Is it possible that we might have a dead pump? We had swapped out a fan in one of the units earlier on.

I like the addition of the actuator log for the pump in your post. I see the tab on my end, but it does not appear to be active. Is this still in development @Drew ? One final thought on the pumps…similar to the way we are able to blink the LEDs to confirm connection in the Device Manager, would it be possible to have a manual water dosing for things like transplants?

In any case, this experiment is indeed proving the power of the MV1 for remote monitoring and adjustment. Once we fine tune recipes and crop protocols we should have a great roadmap for students in the fall.

1 Like

Irrigation System

I honestly just put together that we were using it as a flood/drain system myself - so no worries there.

I would try to manage this just by letting the exterior of the rockwool dry out occasionally. It’s really your choice here and I honestly don’t know if there’s a conclusive ‘right’ way to do this. The trade-off you’re going to make is that if you let the tray dry out completely then all of the roots will be limited to growing within the rockwool. It could be beneficial to have some longer roots already growing before you transplant into larger hydroponic systems though - so there could be a benefit to having it stay flooded continuously so long as the algae isn’t too bad.

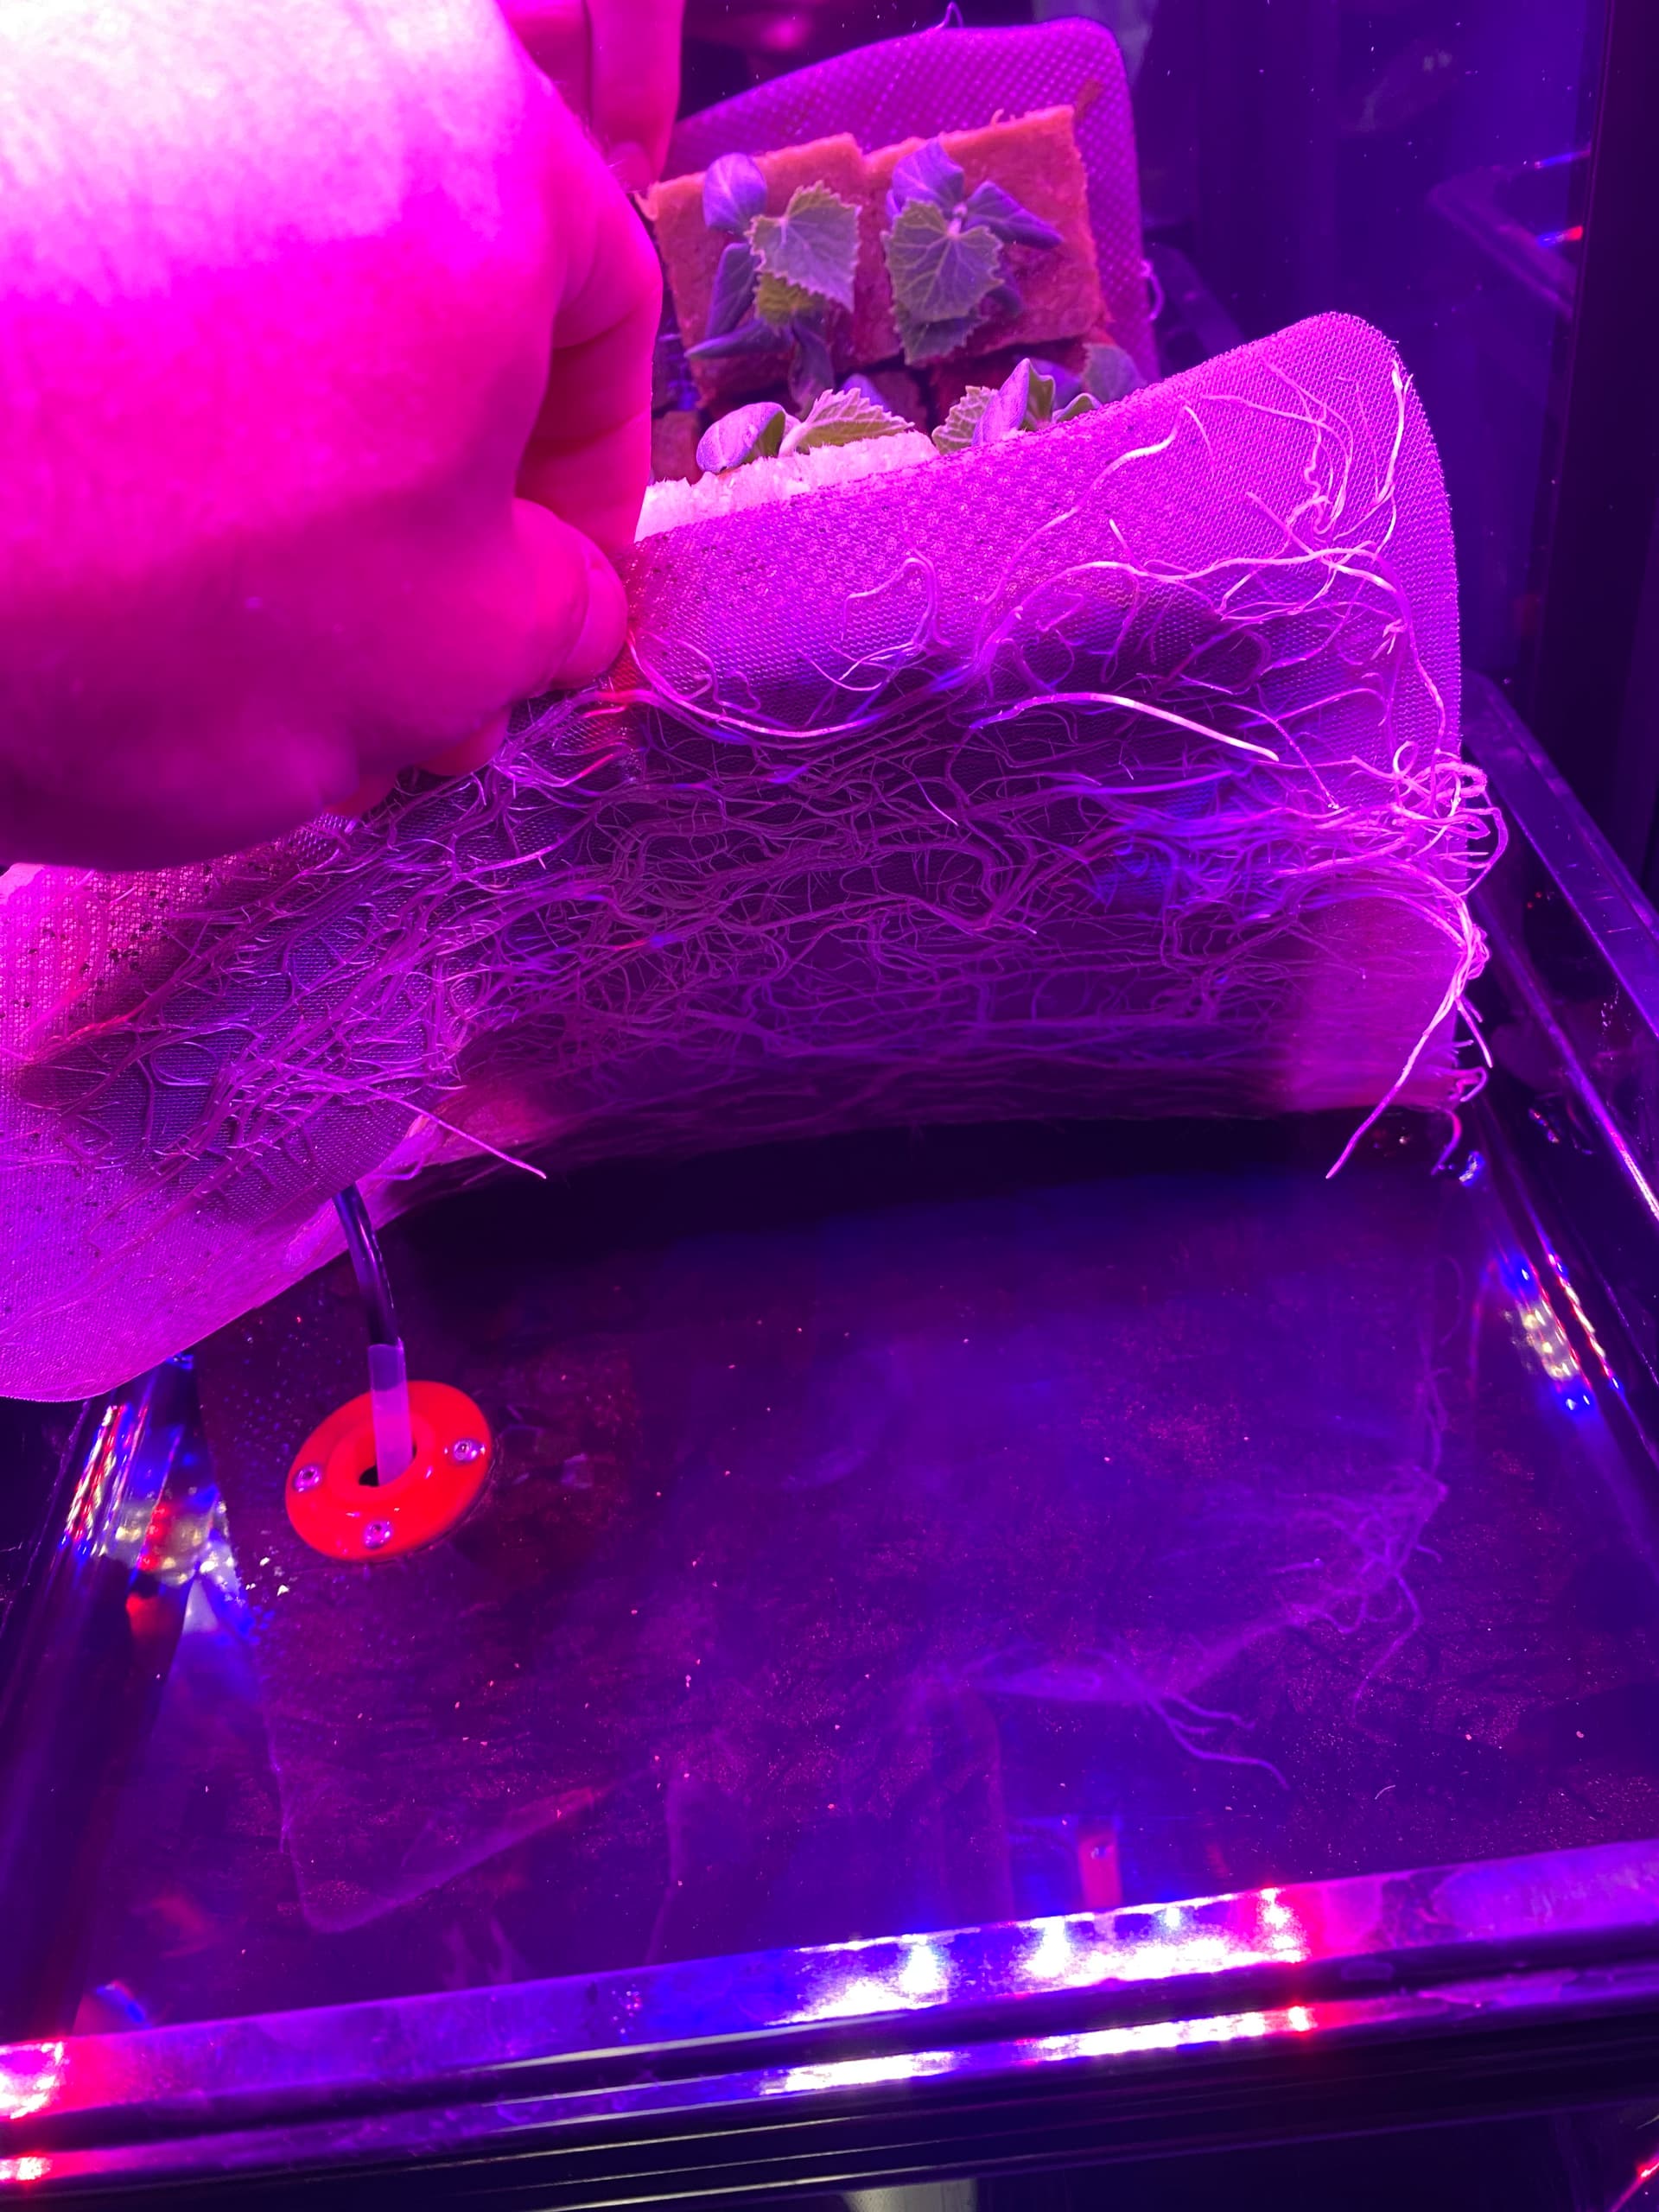
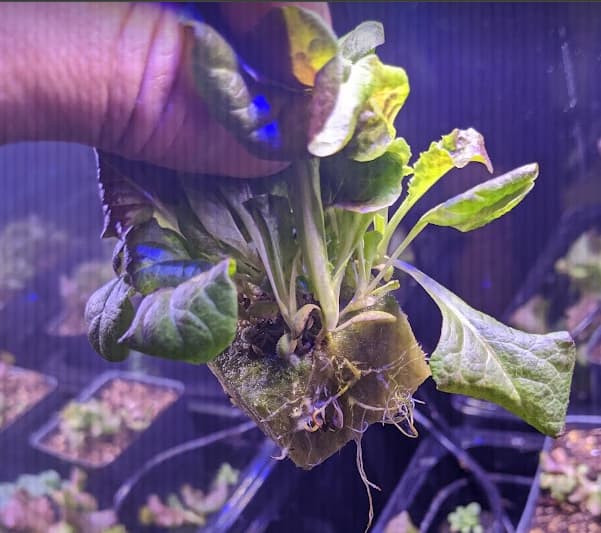
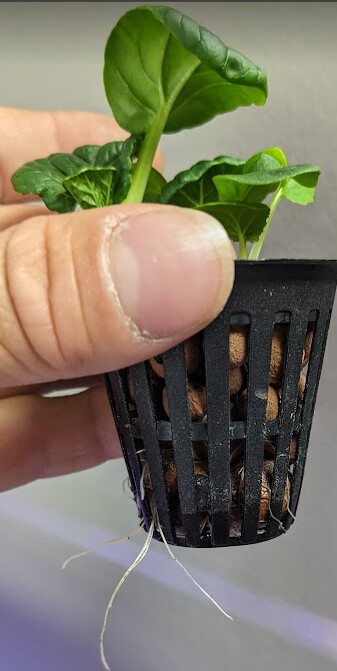
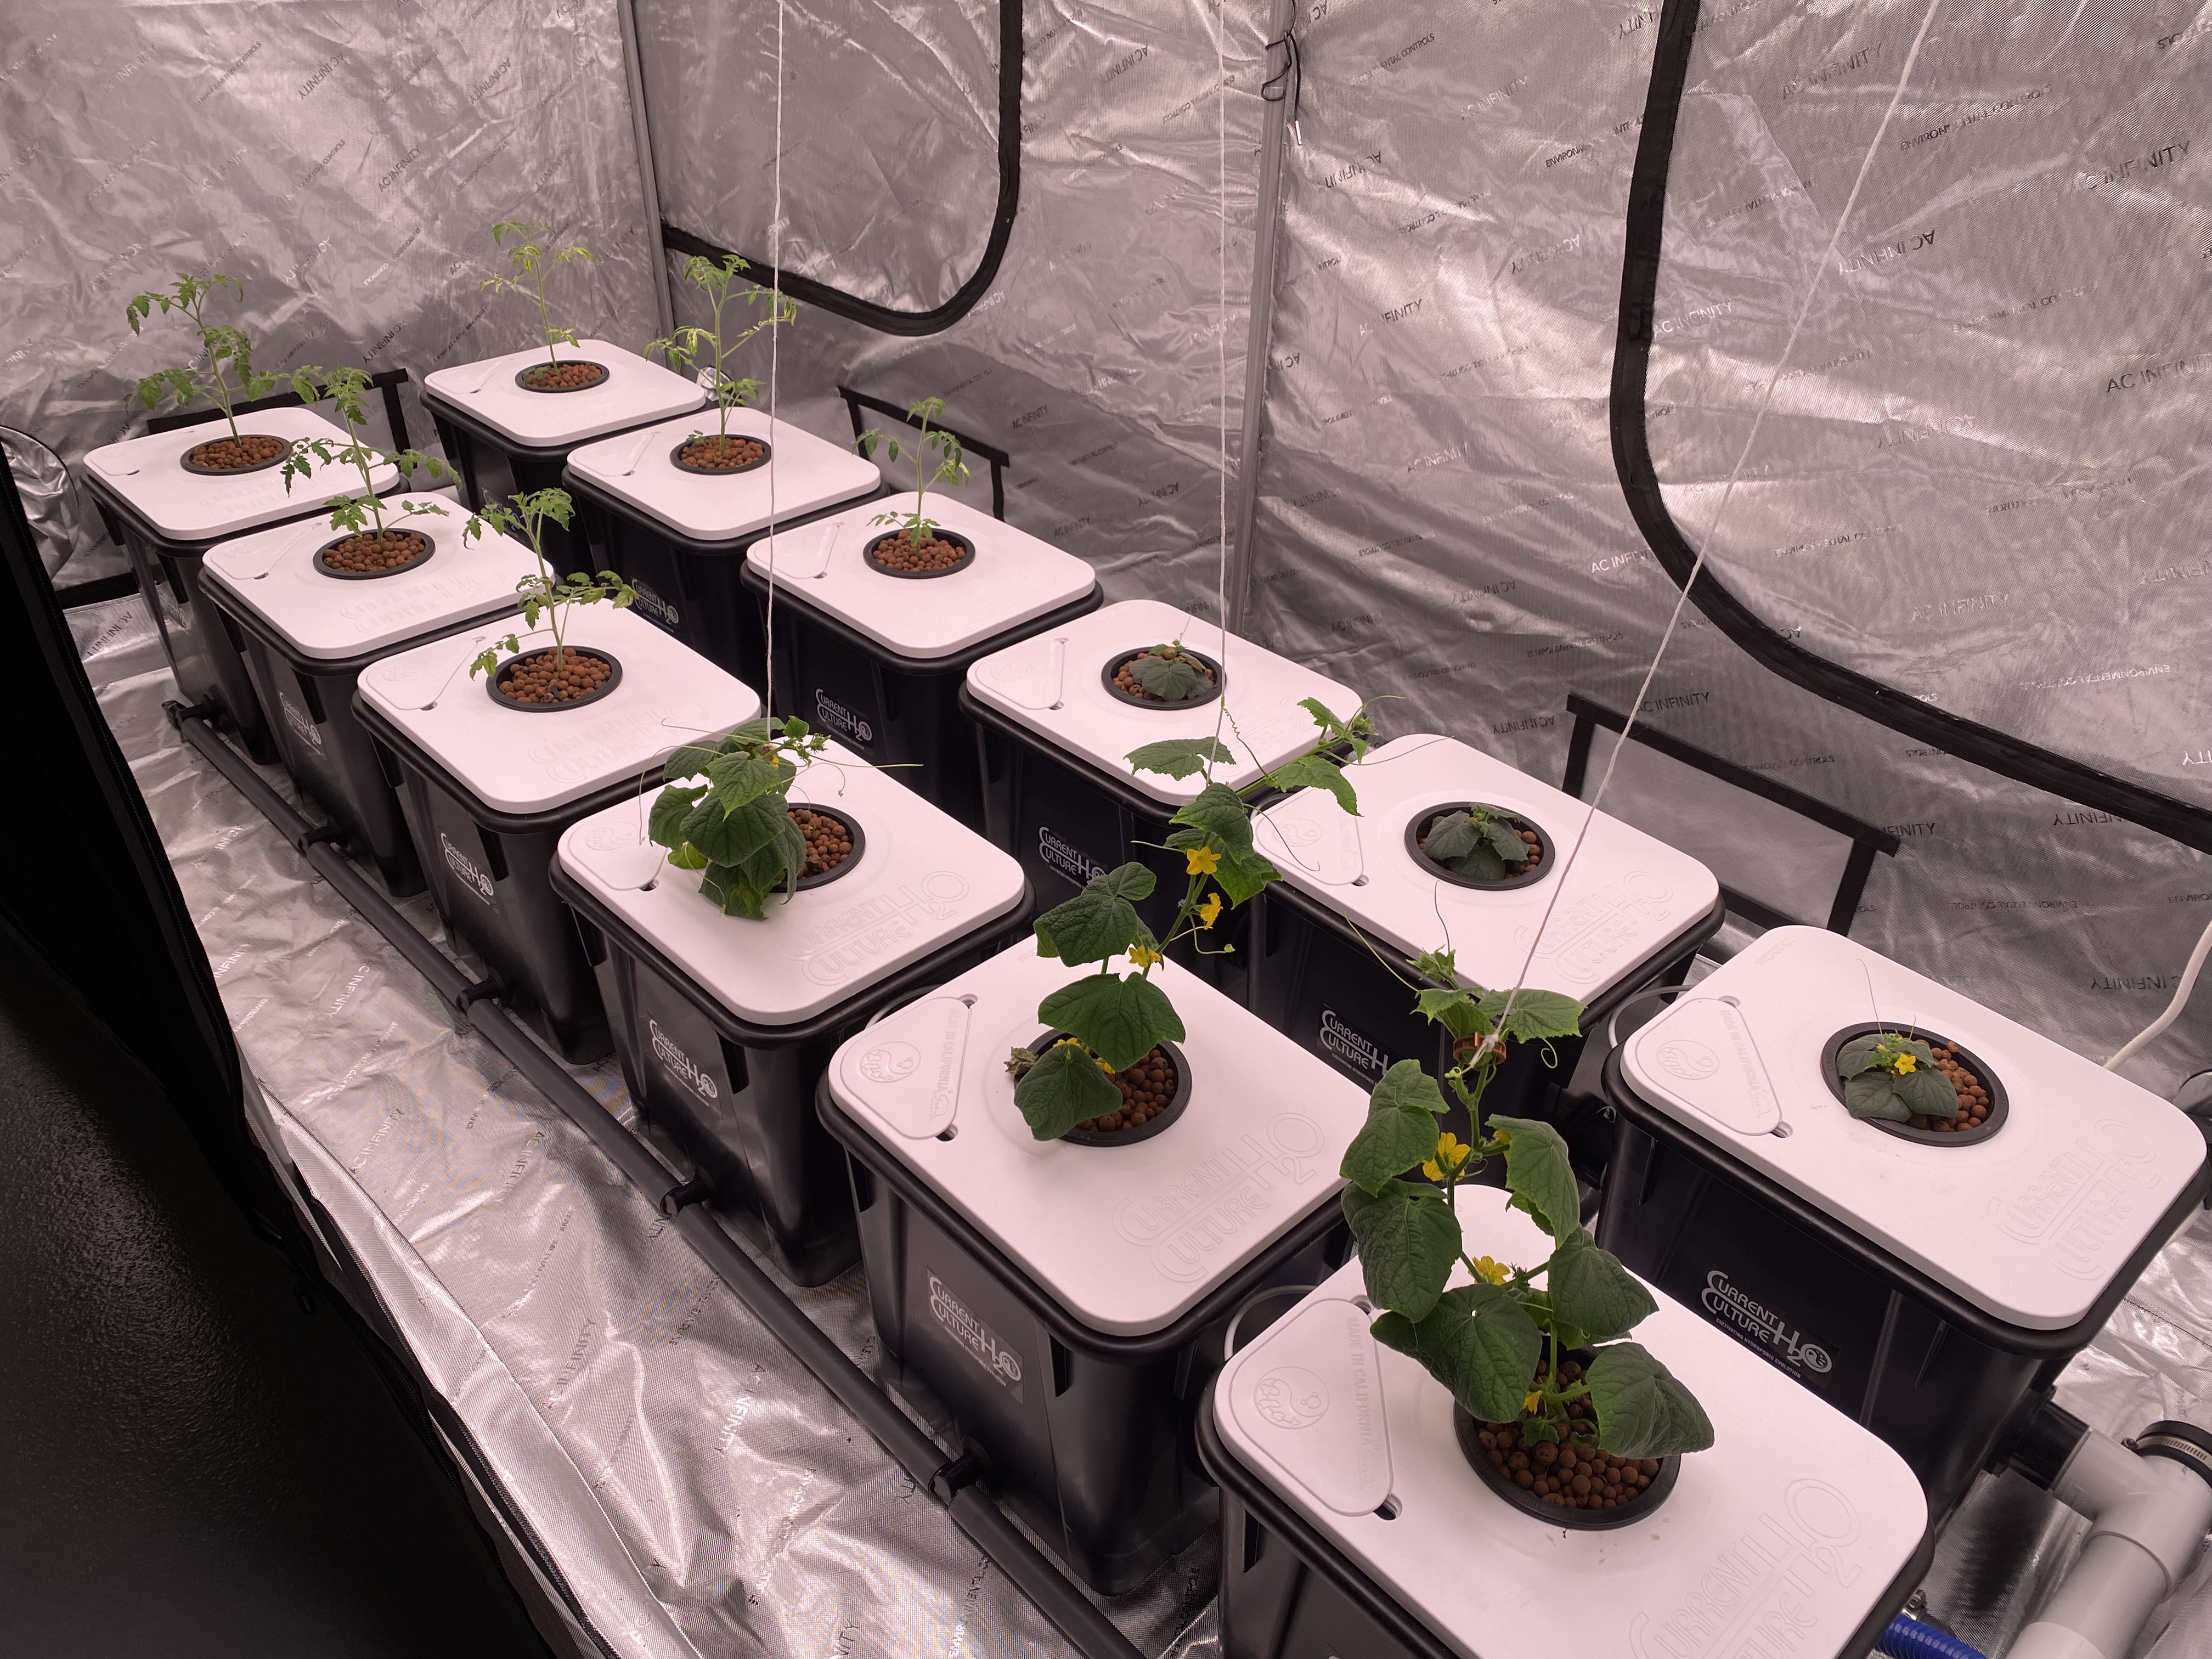
Those nice hanging roots which make it super easy to transplant this into a larger system.

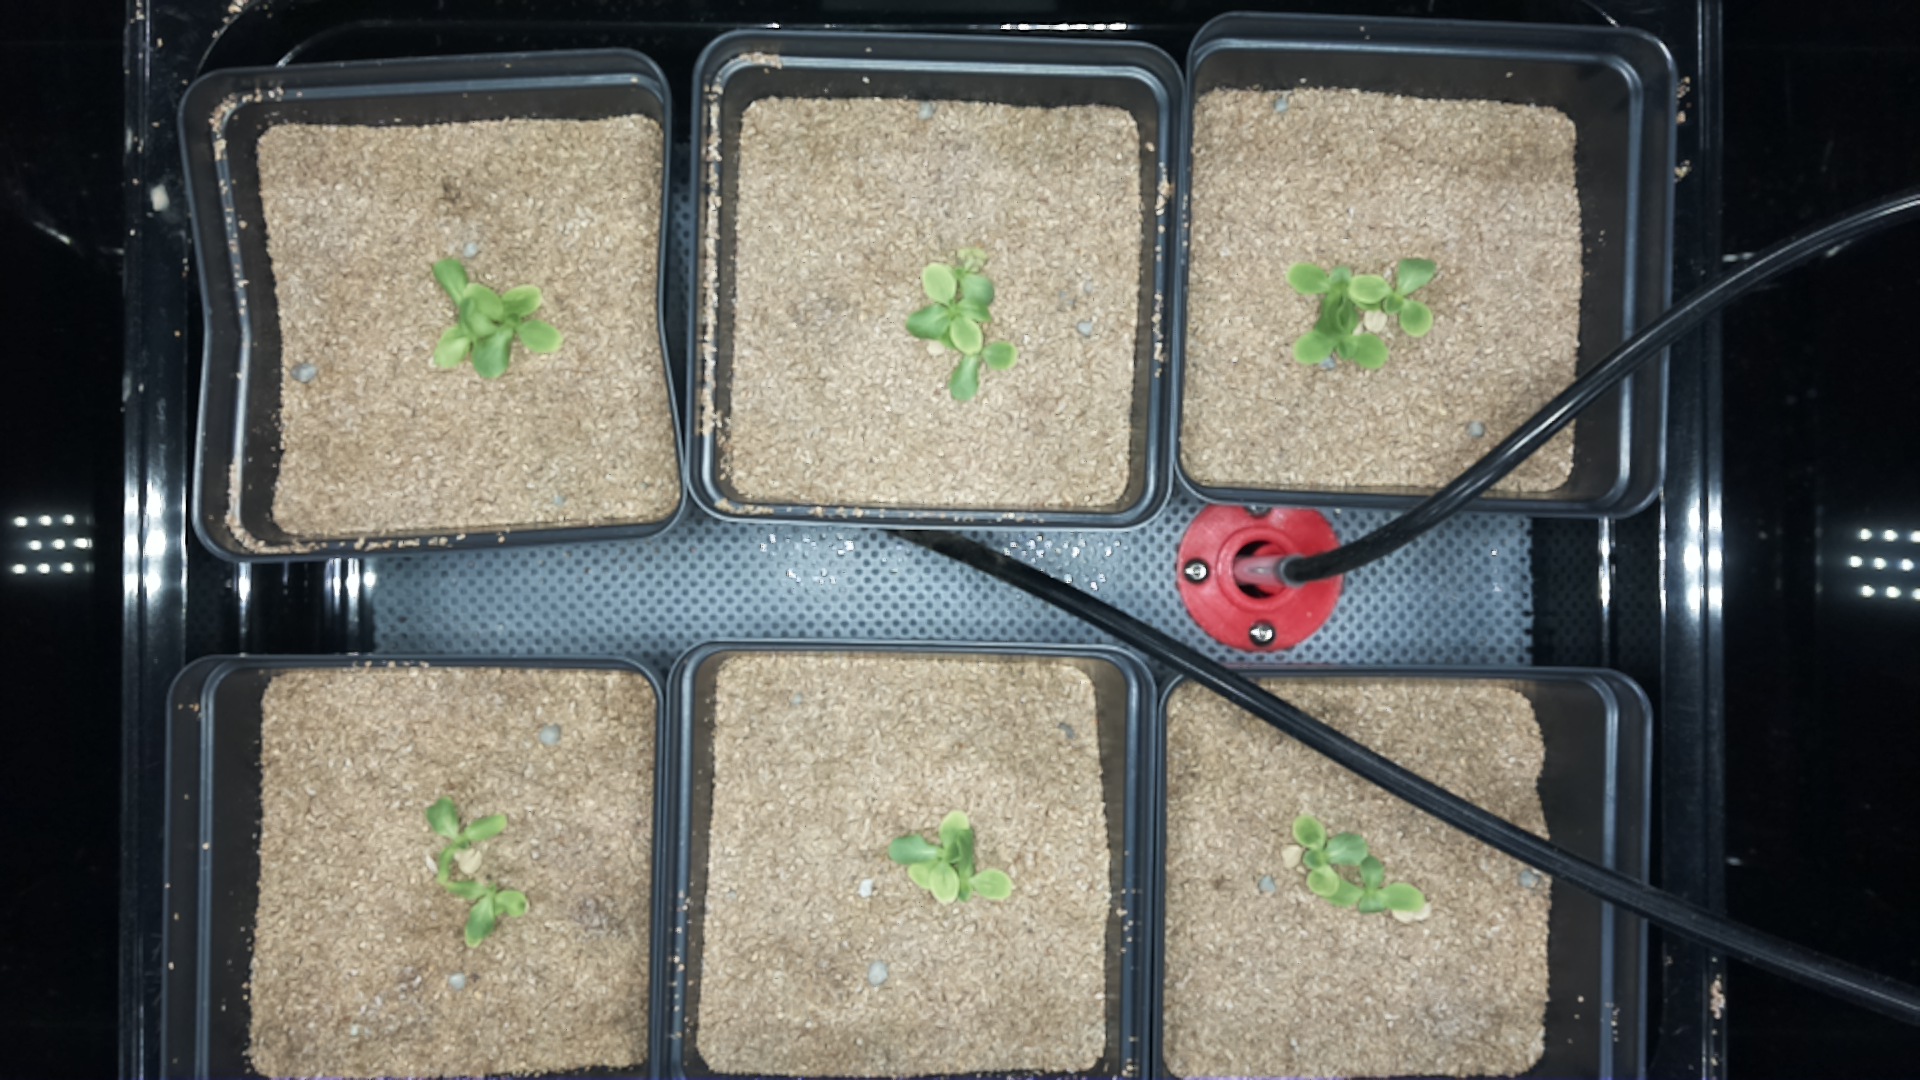
Regarding ‘foiling’ the cubes - it’s not a bad idea. When I transplant rockwool into a net cup for a shallow water culture or deep water culture system, I like to use aquarium gravel (colorful, pre-washed, etc.) to cover the surface of the rockwool for exactly this reason.

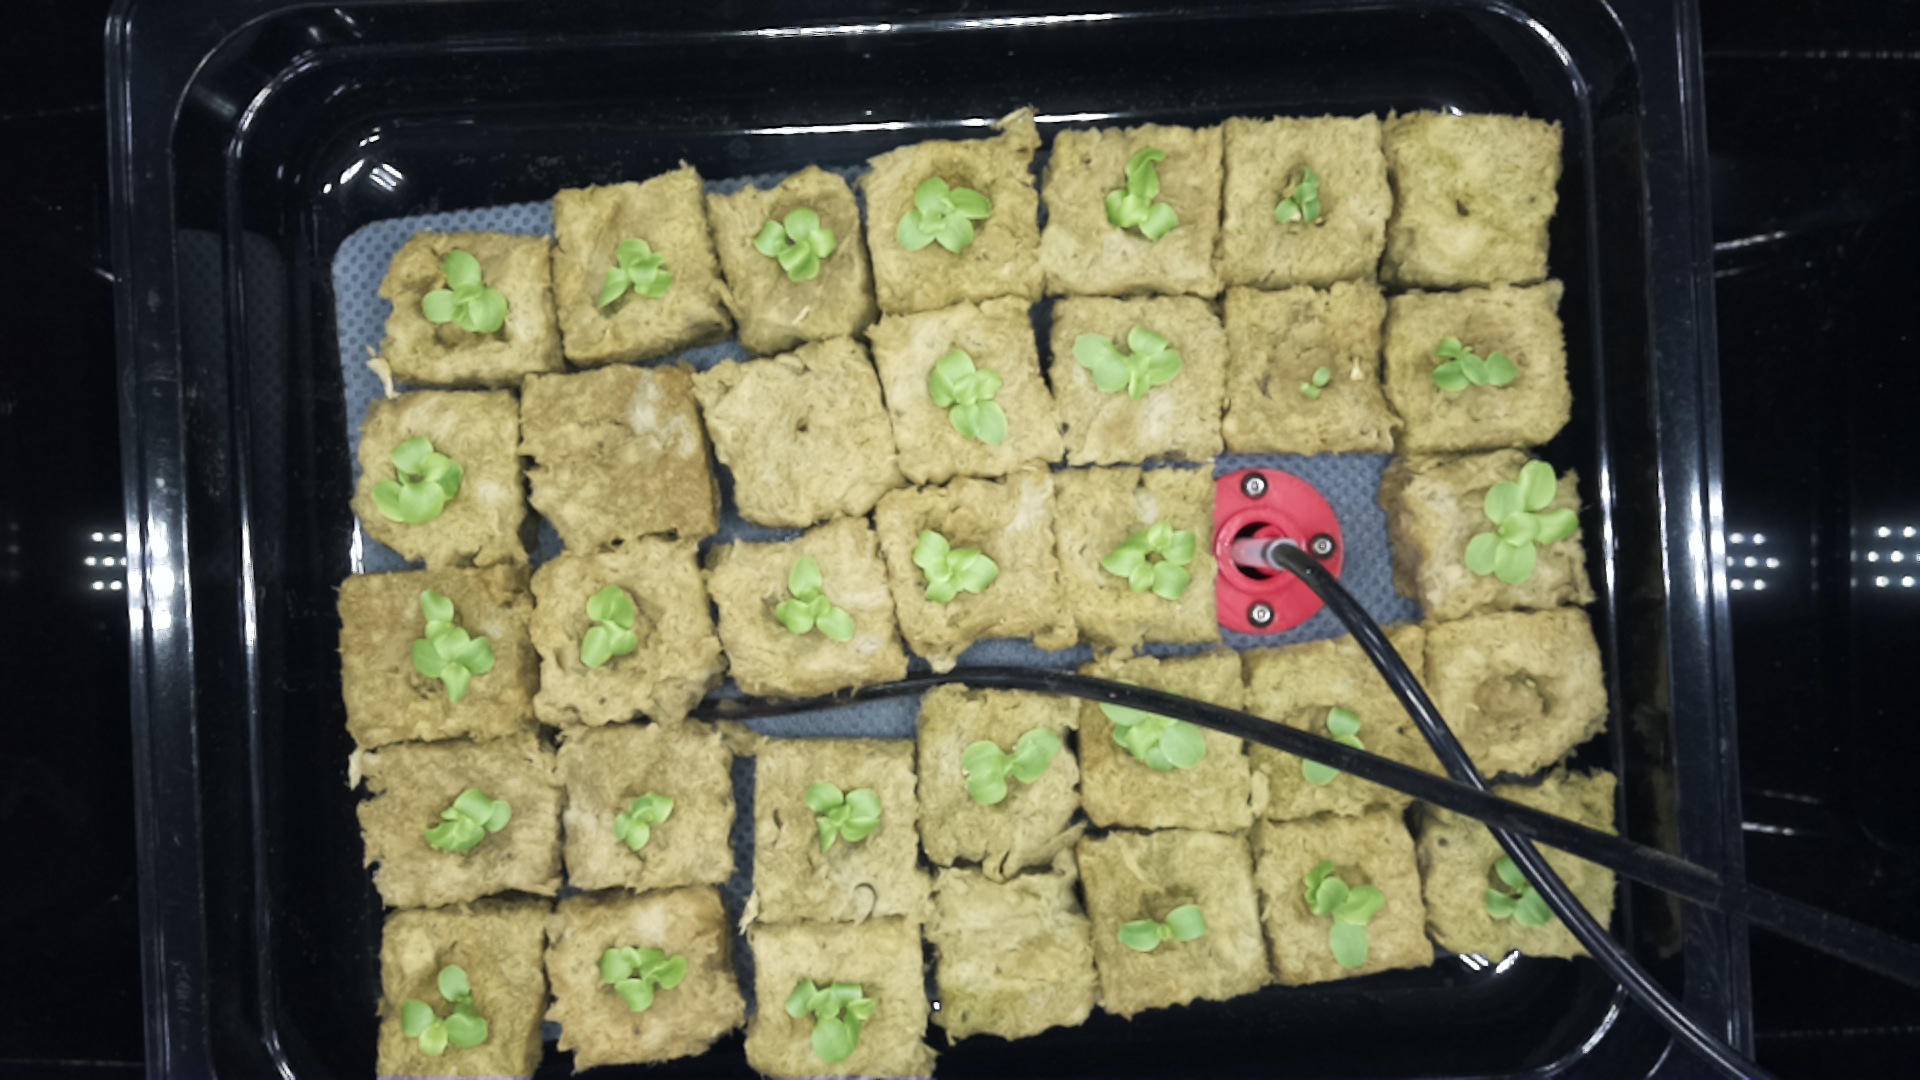
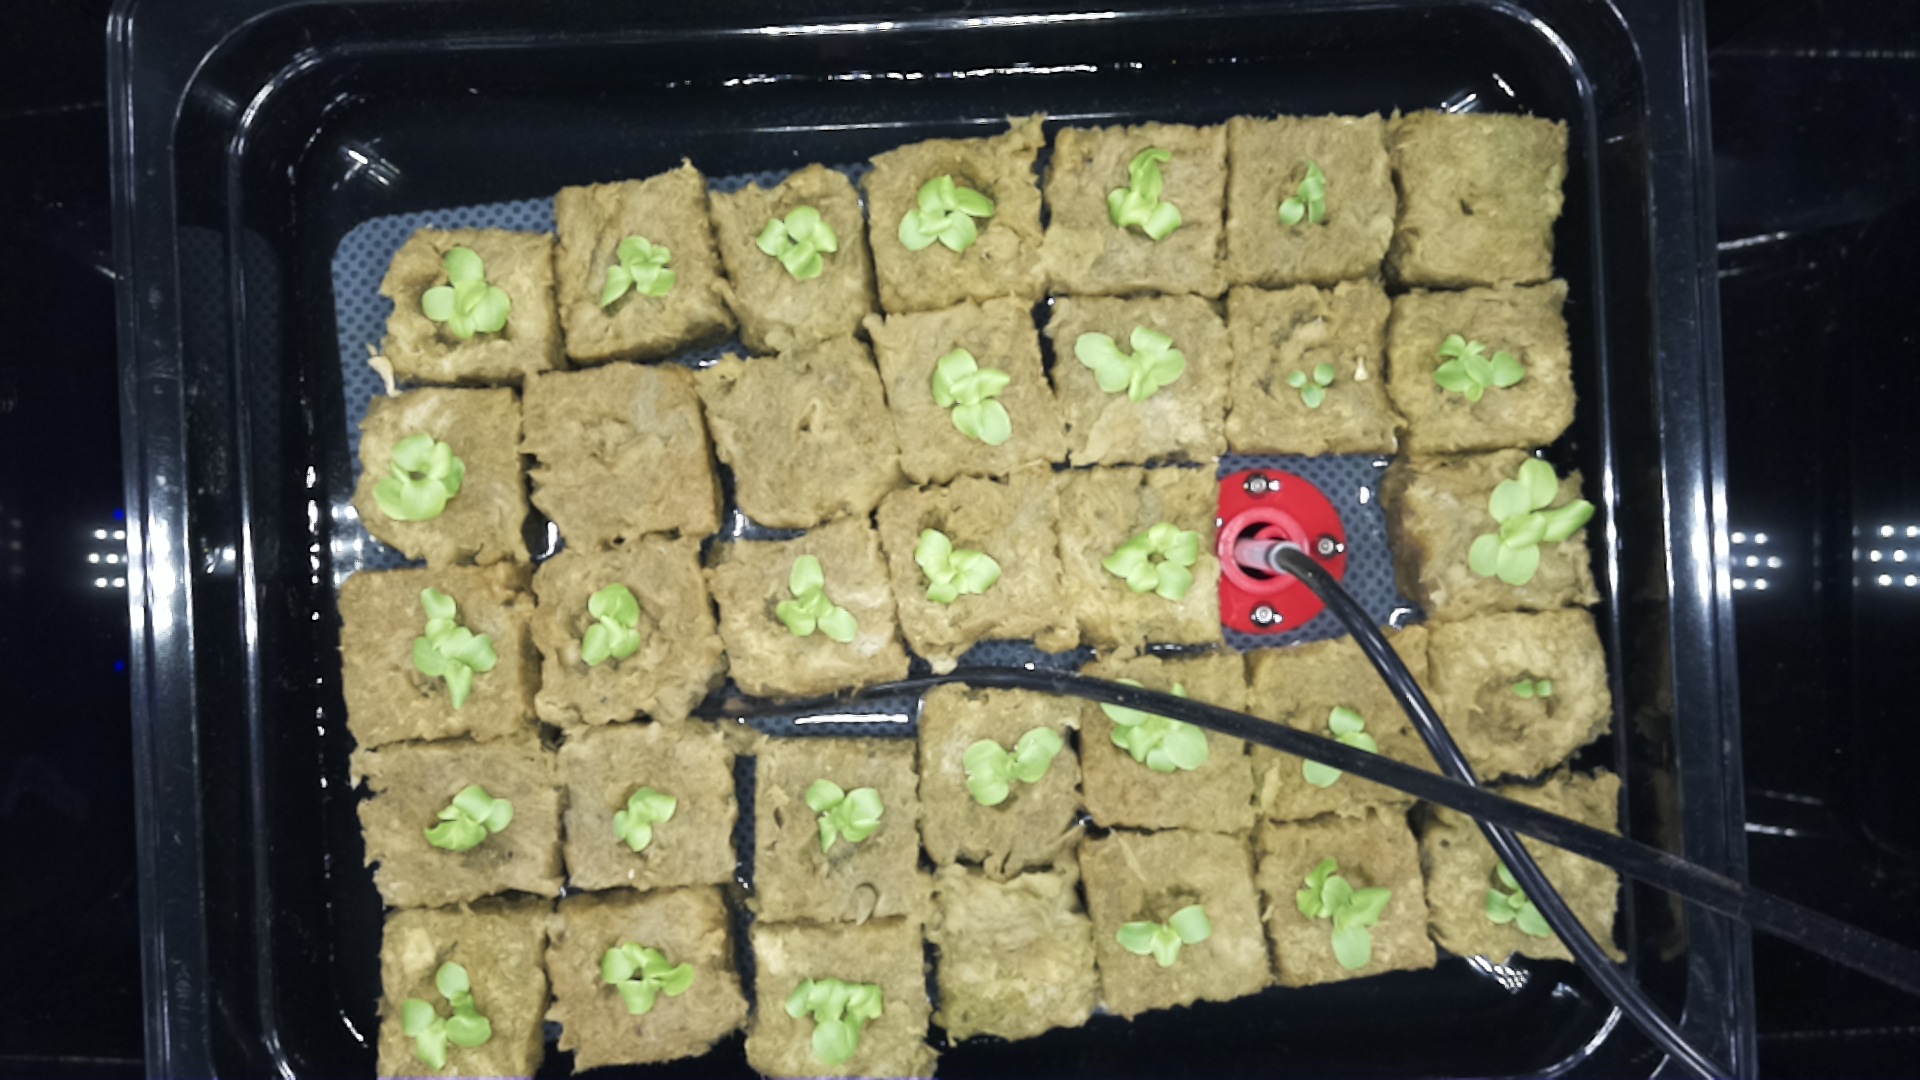
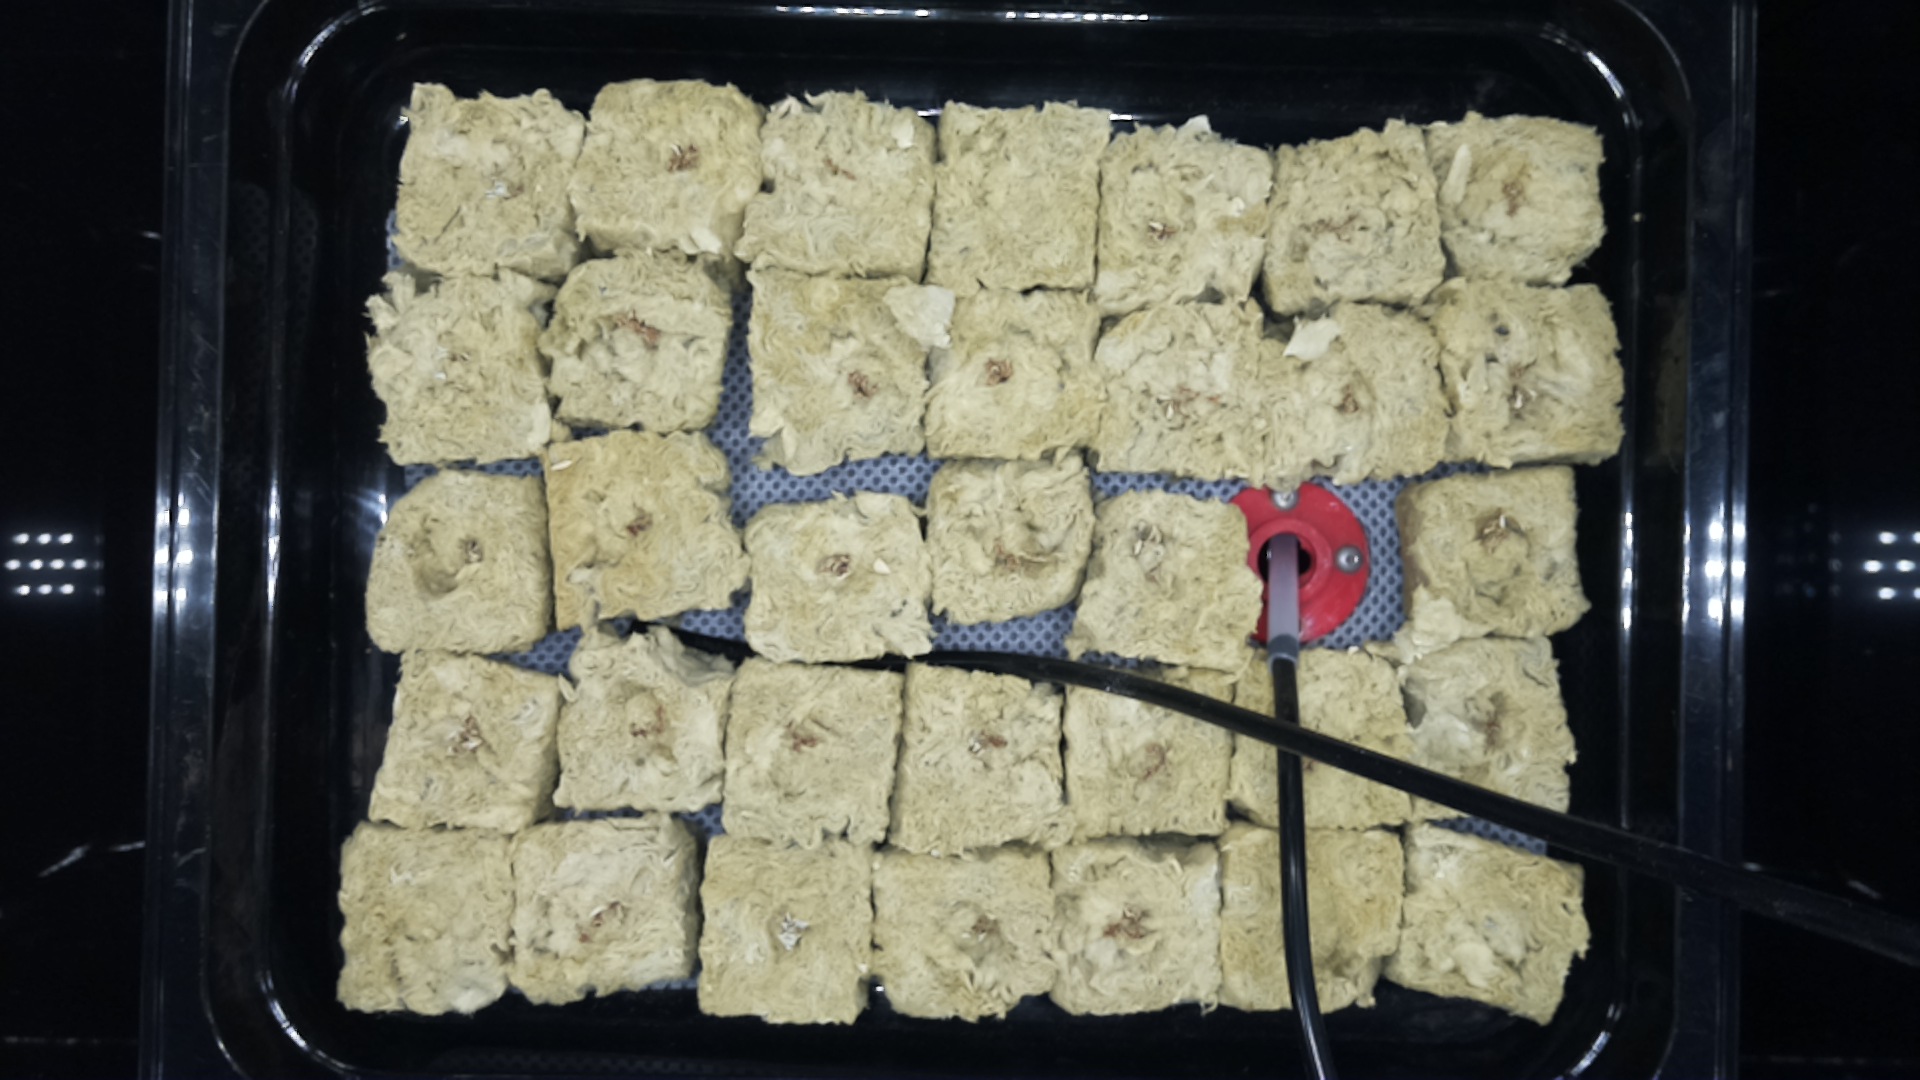
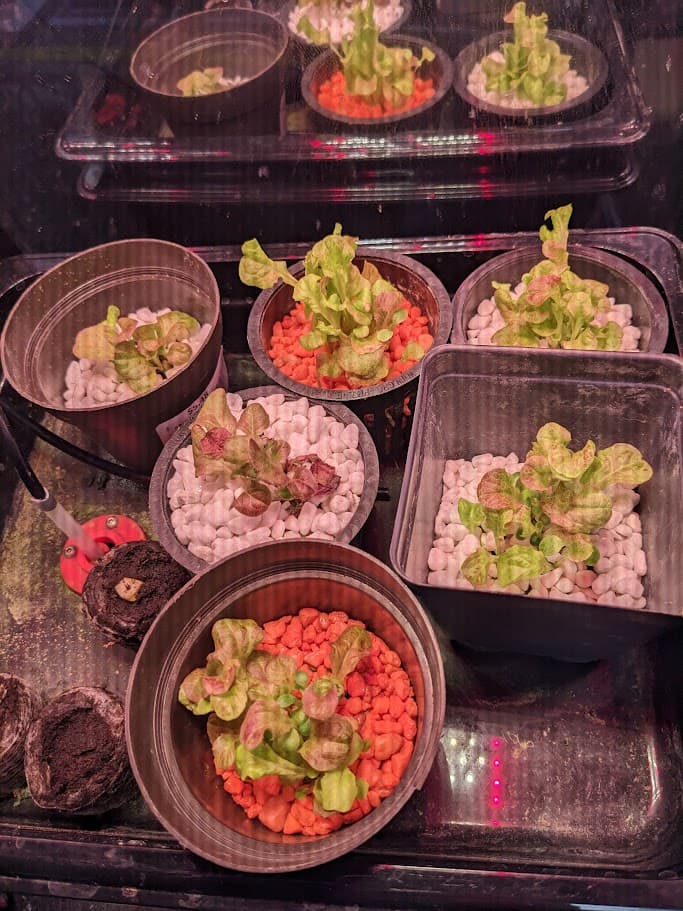
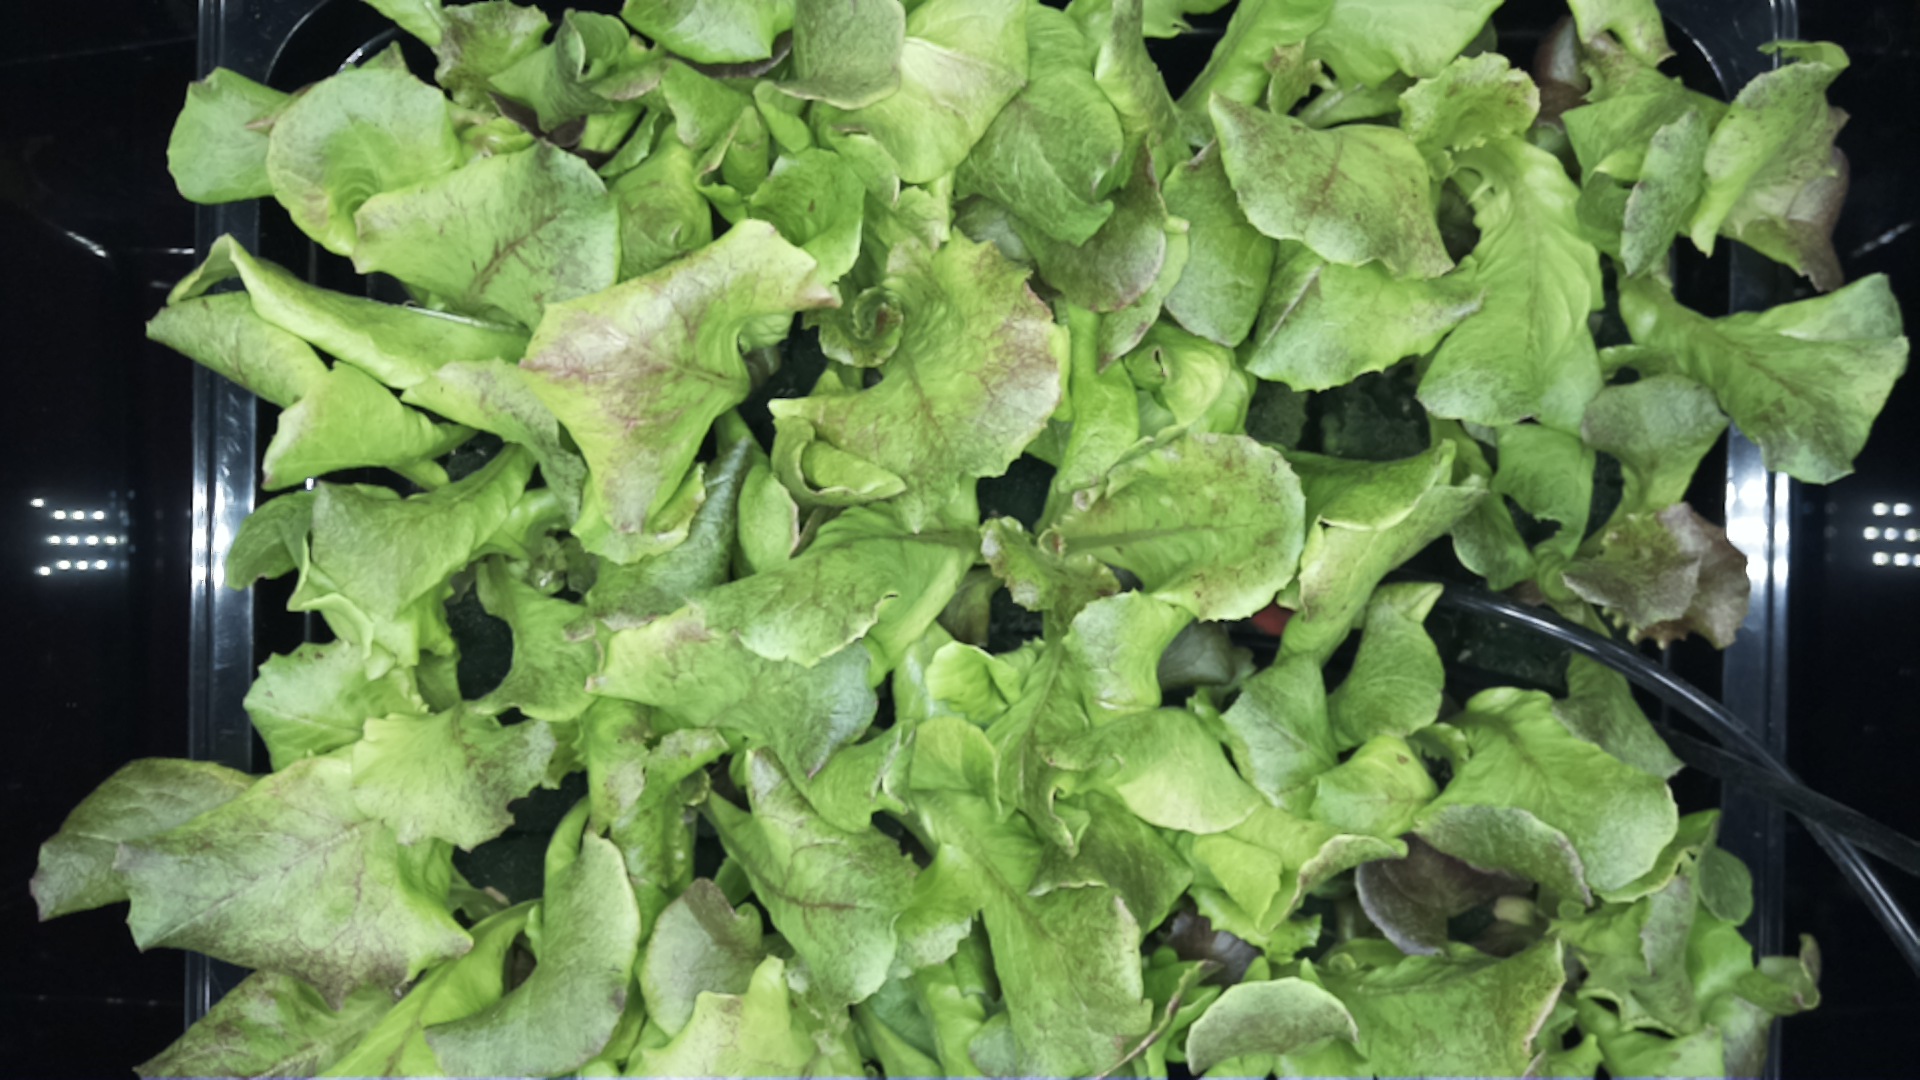
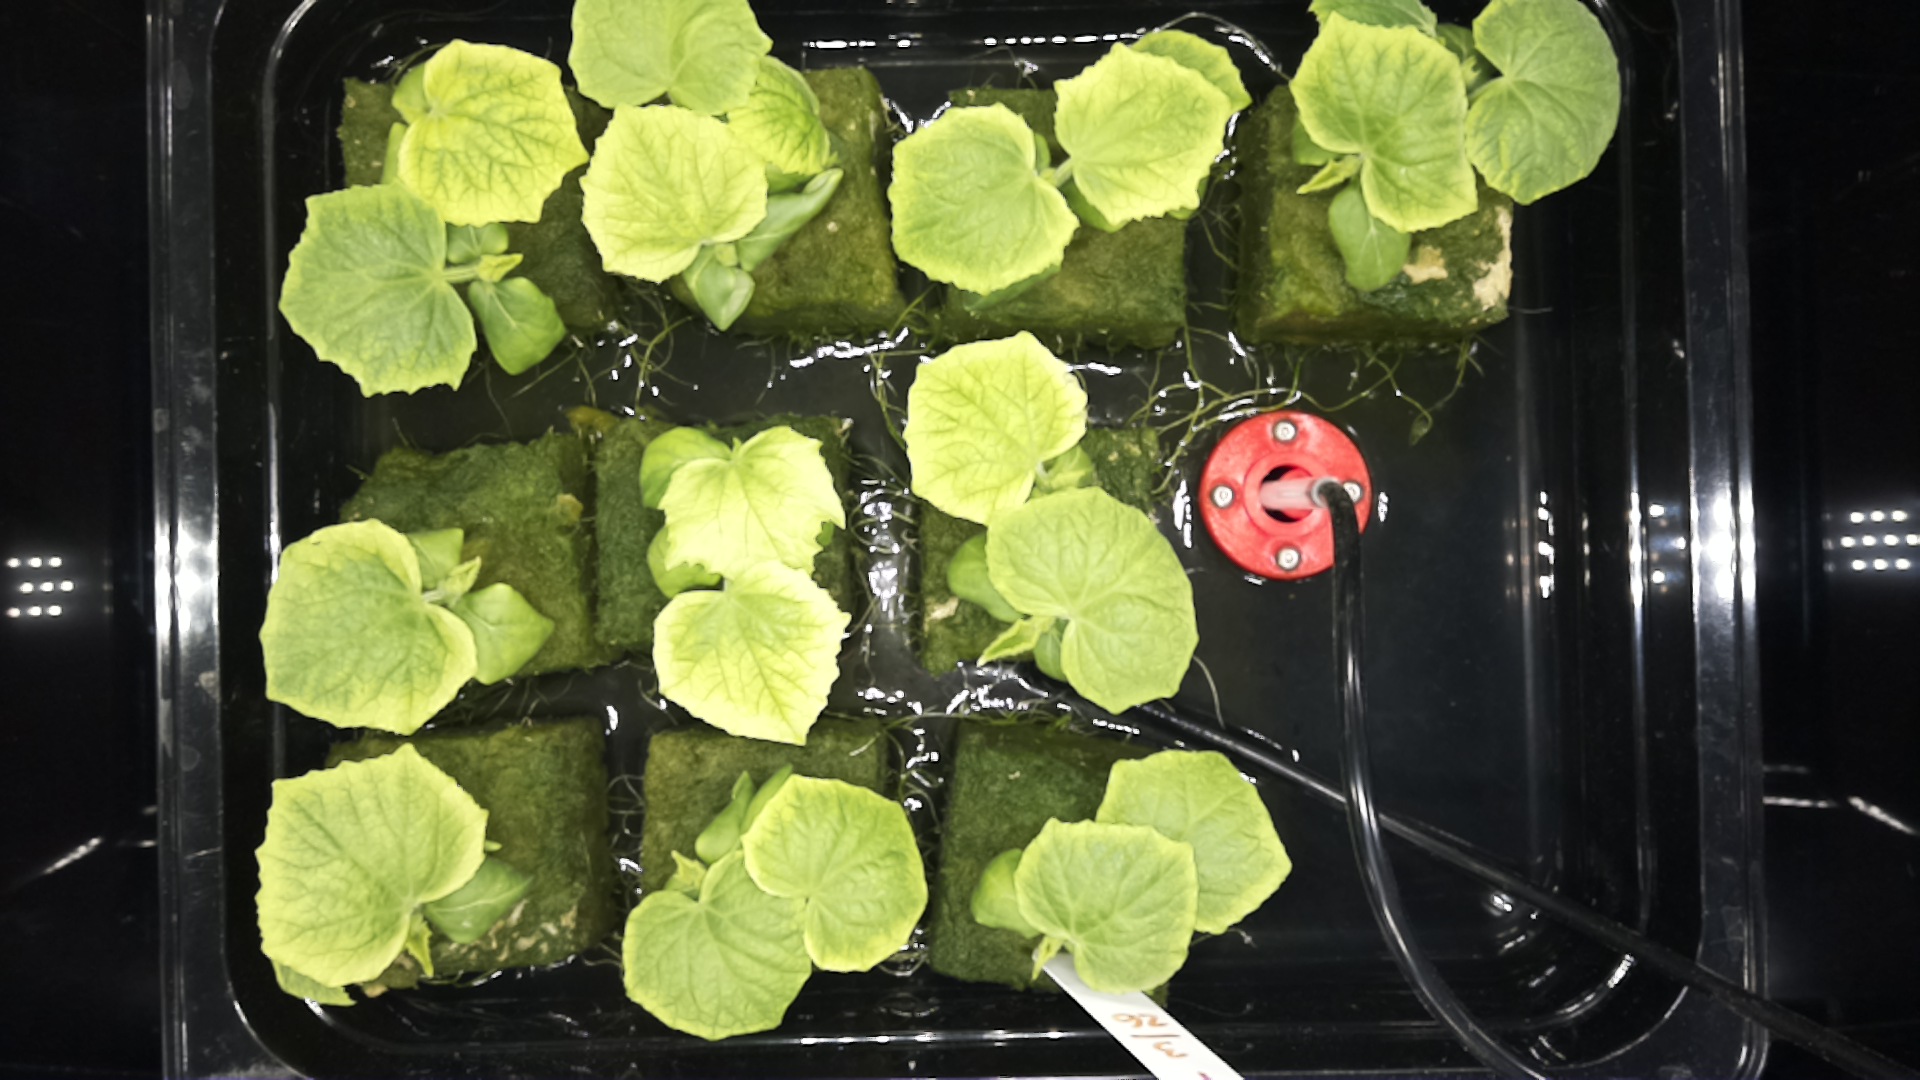
If I don’t use aquarium gravel, the rockwool surface looks like this after nutrients of 1000 ppm for two weeks.

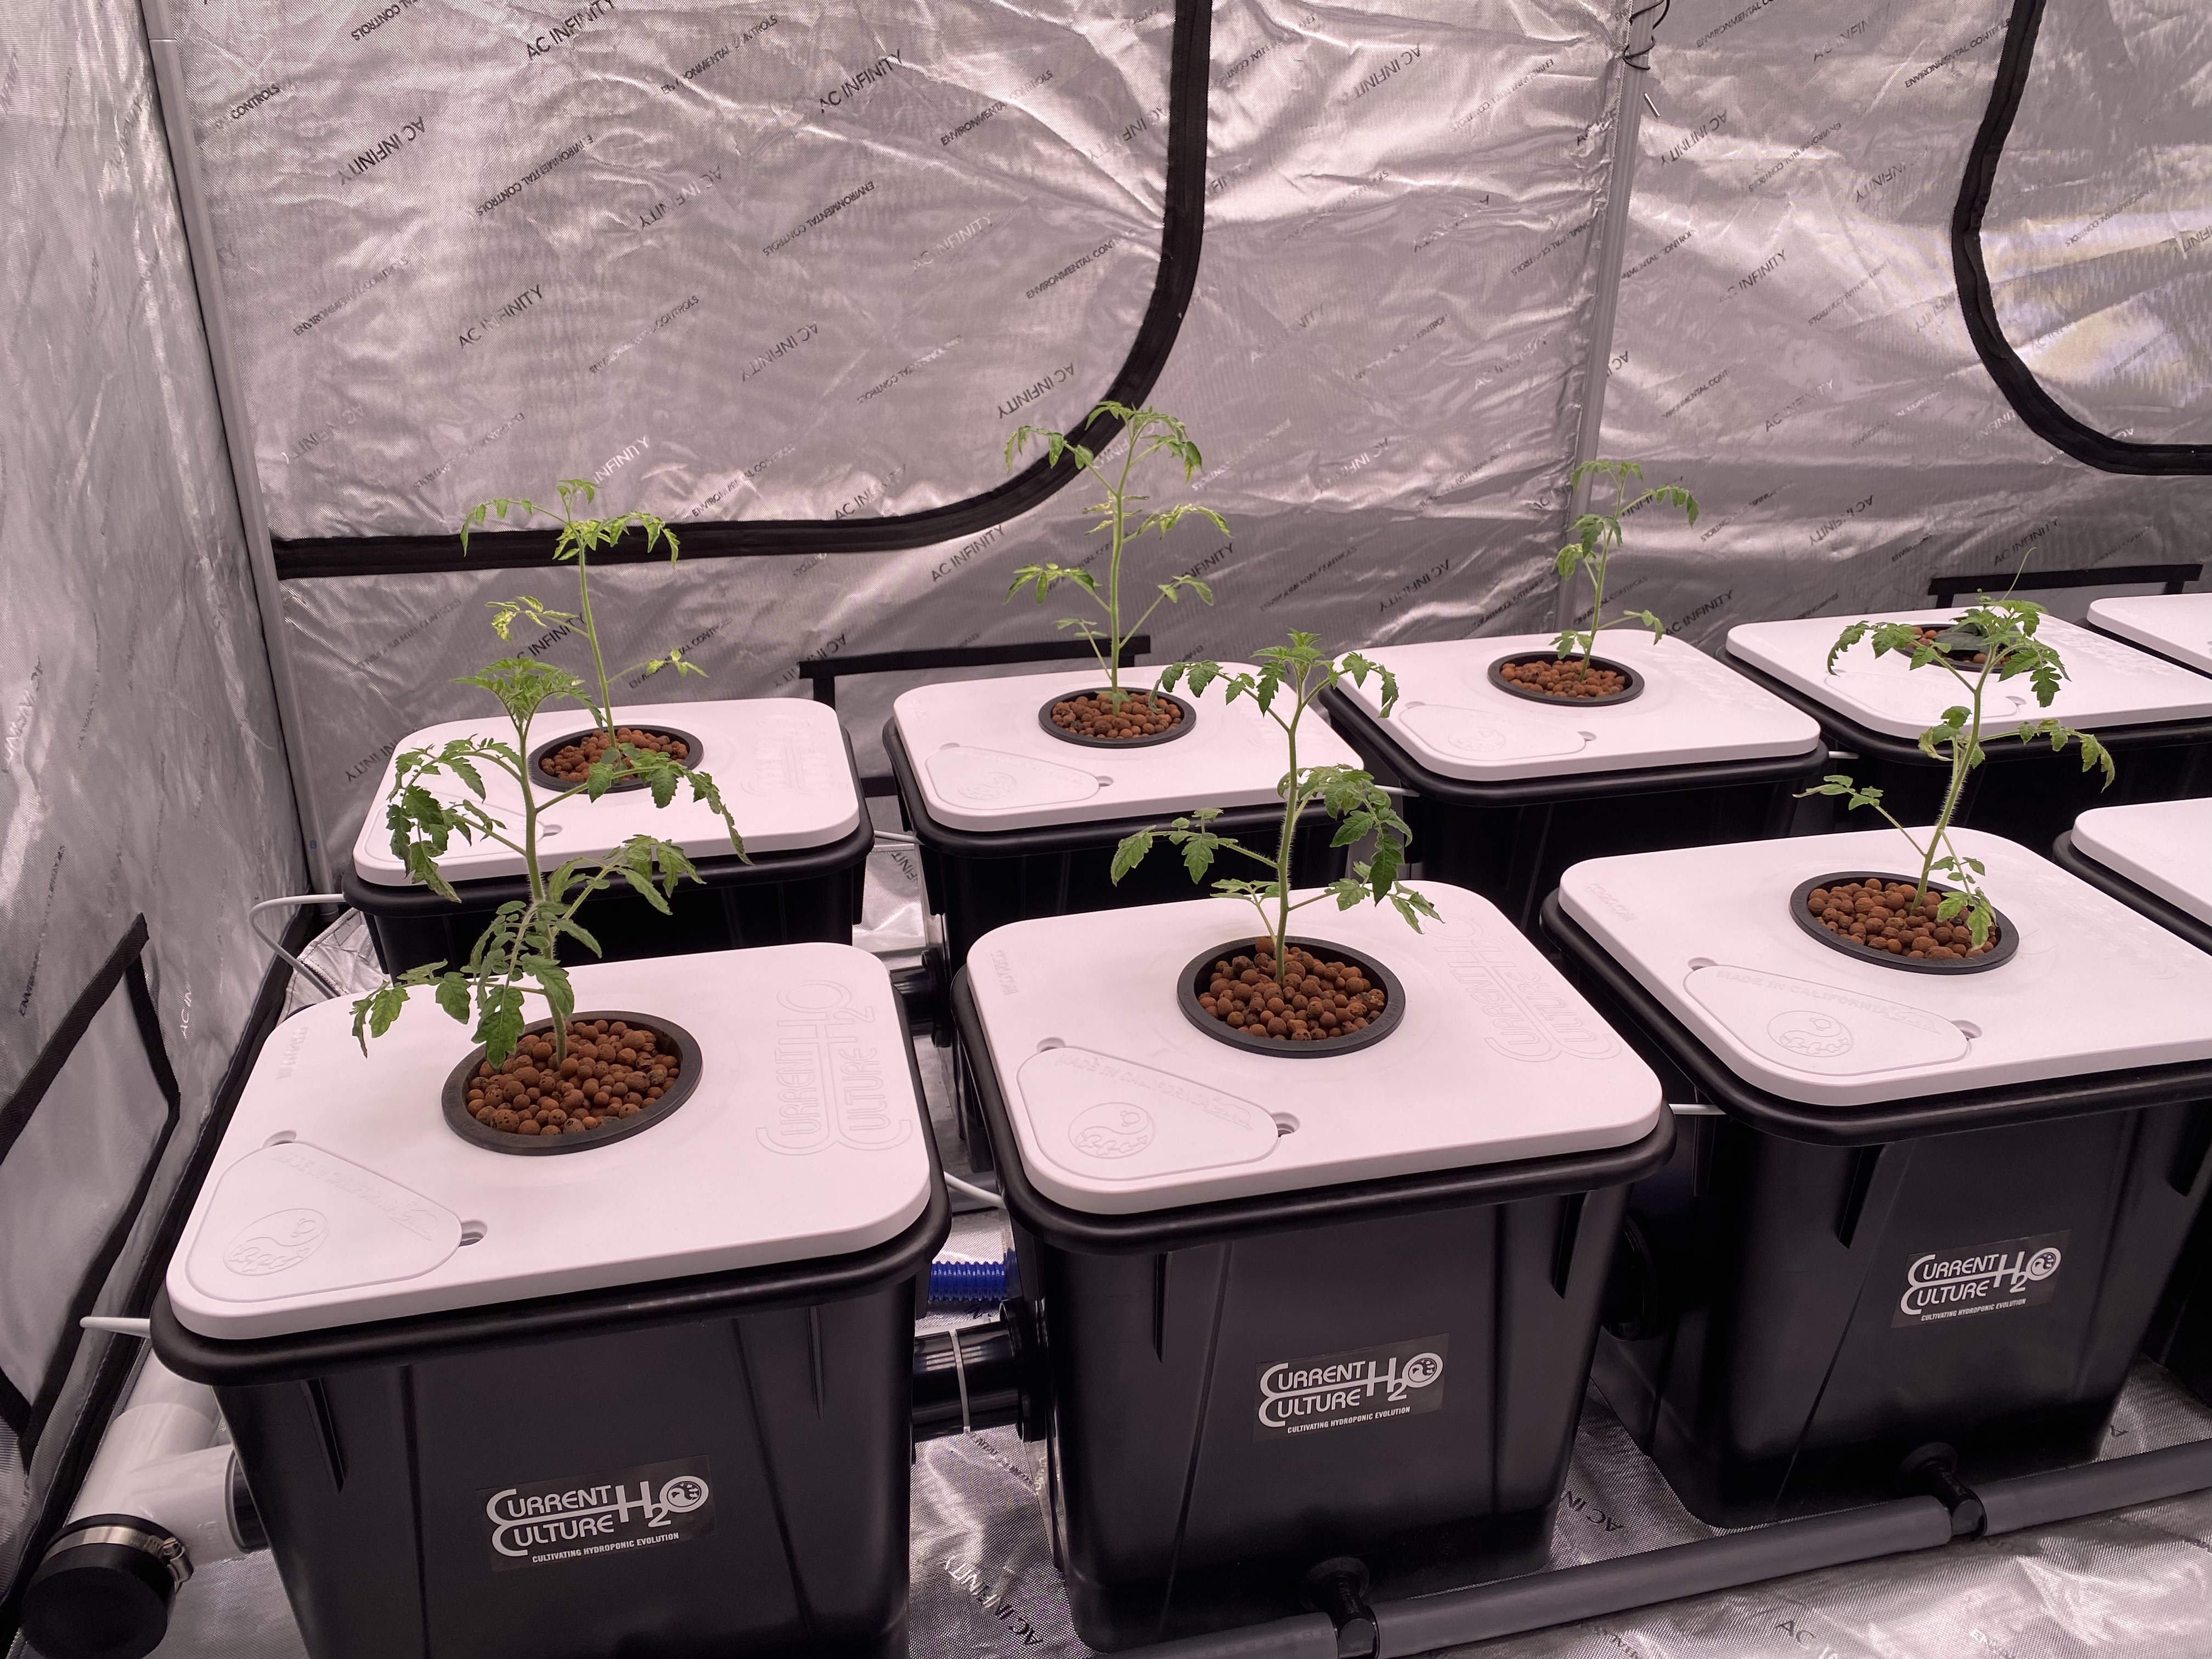
Same idea, using hydroton (expanded clay, which is super water absorbent and porous) and no rockwool even


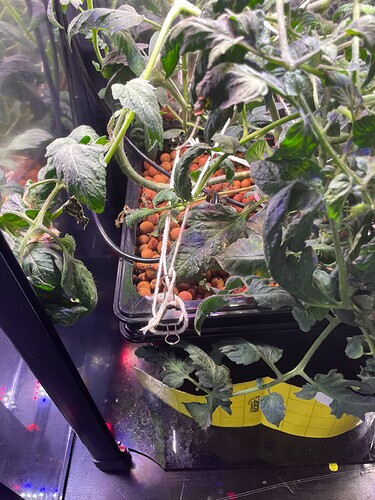
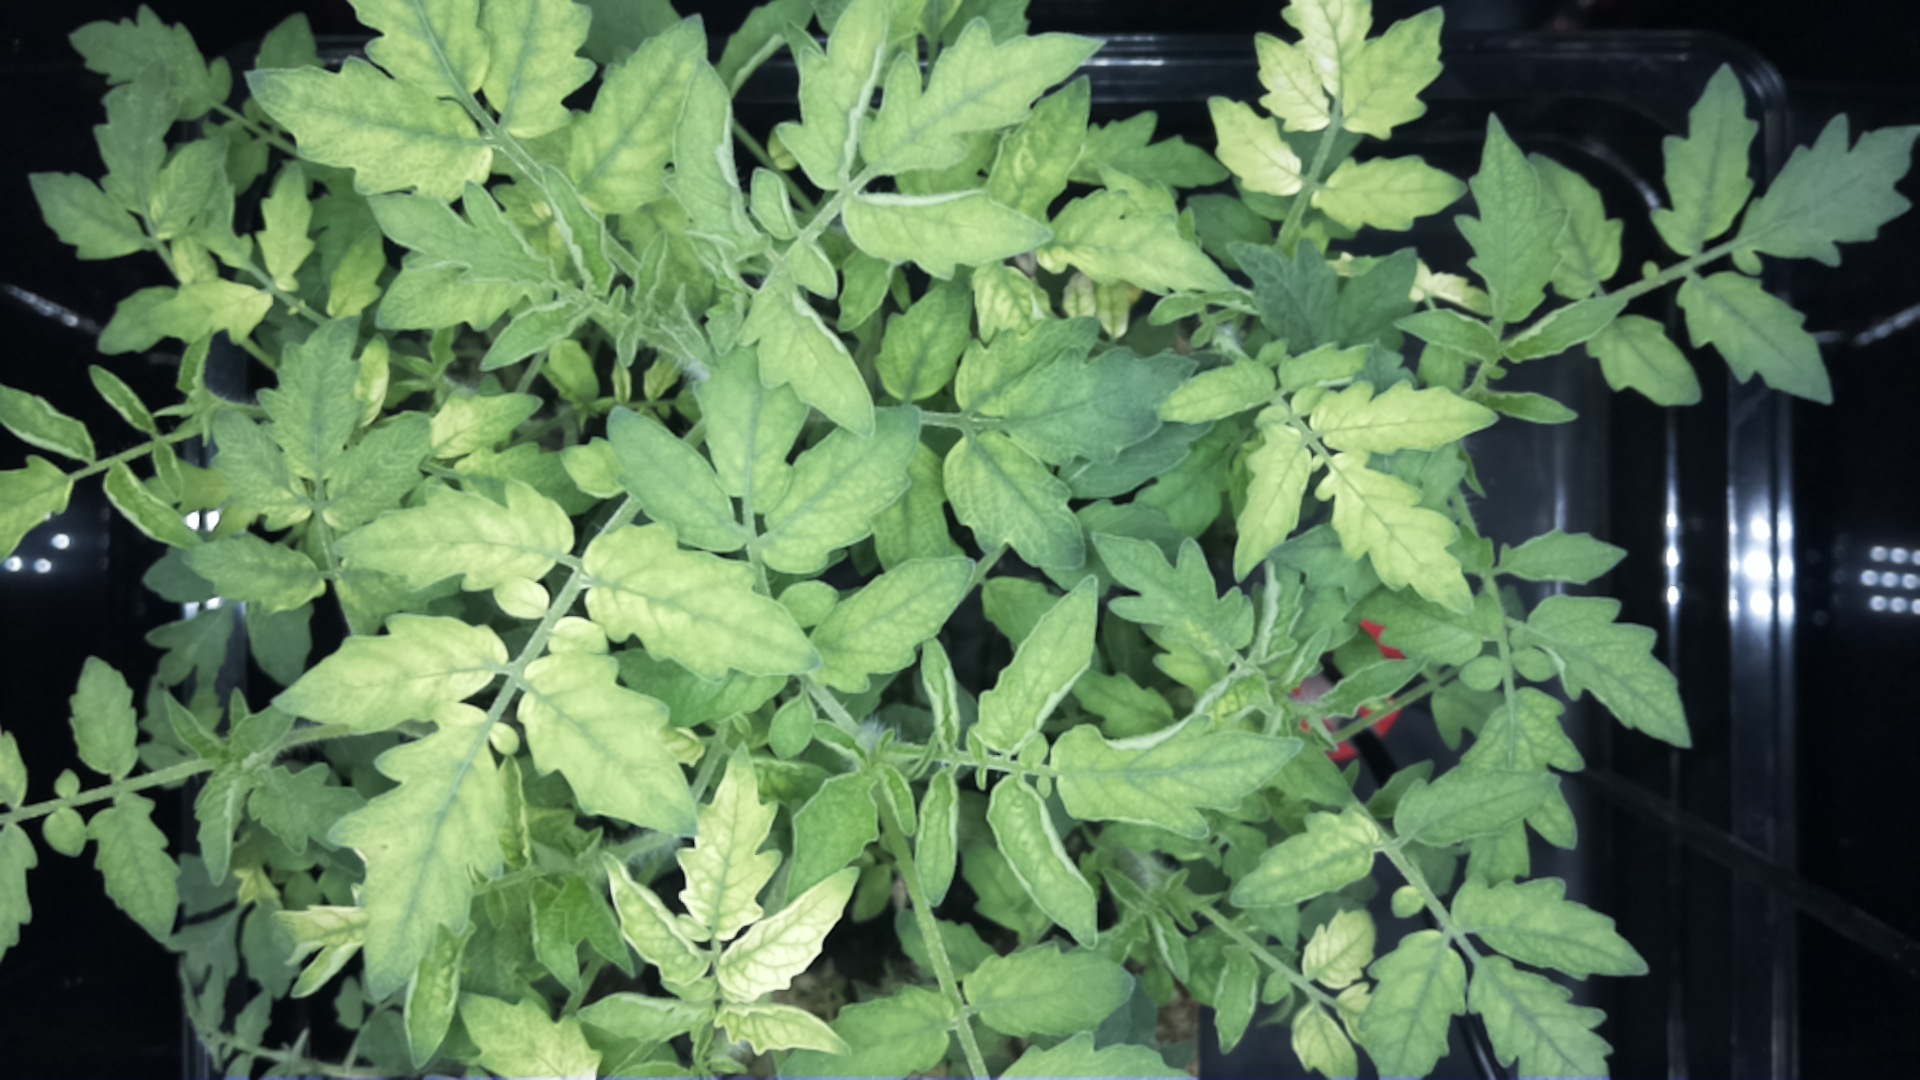
If you wanted to just leave the rockwool in the MV1s and just cover it with hydroton - that’s exactly what I did here for one tomato plant that I grew for about 3 months.
image

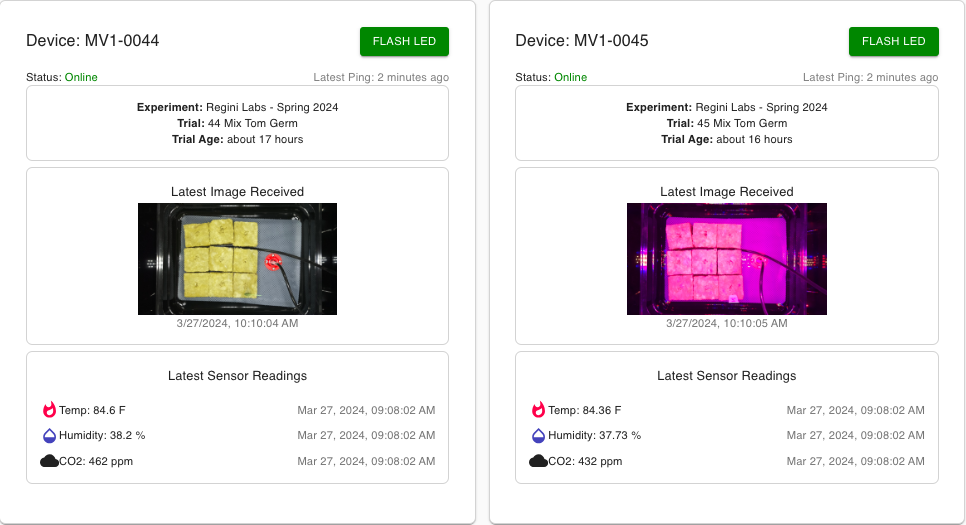
This would be the first one in the field - but it’s possible. I’ll ask @Drew to follow-up about replacing it.

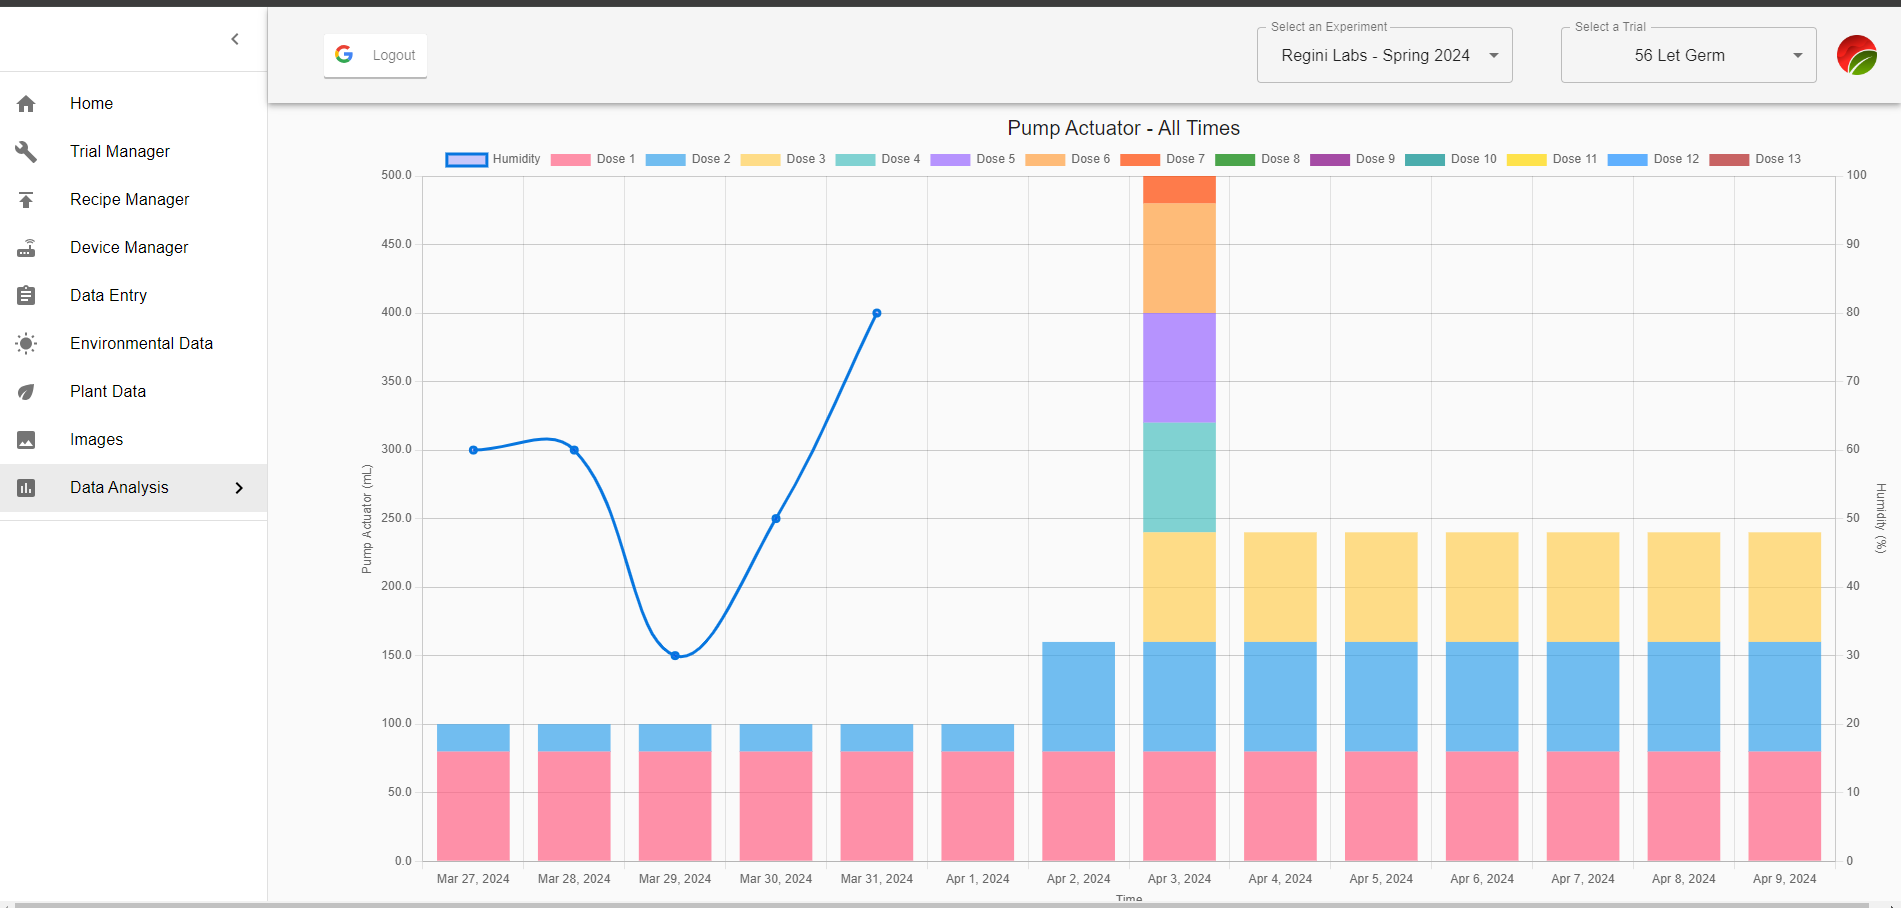
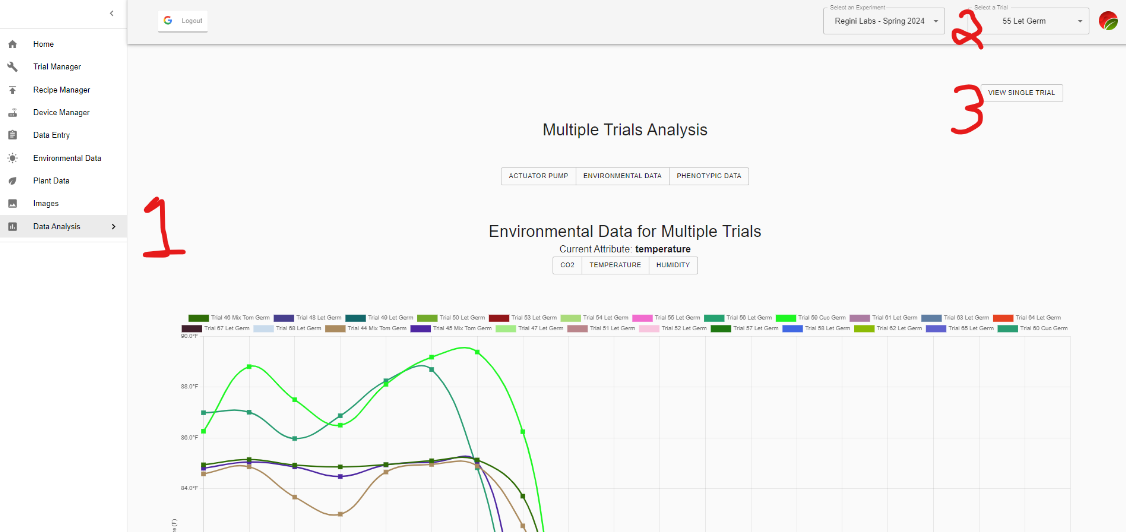
It should load for you - the navigation though on the charts is not intuitive yet. You’d need to click:

  1. Click on ‘Data Analysis’ tab from the navigation menu (make sure you’re in the ‘Regini Lab - Spring 2024 Experiment’.
  2. Select the trial you want to view pump data for from the top right drop-down menu.
  3. Click the ‘View Single Trial’ button
  4. Click the ‘Actuator Pump’ button and then the chart will be displayed below. You may then select different trials again from the top right down-down menu to check on different devices.

Absolutely, an ‘add 80ML’ button next to ‘FLASH LED’ is definitely in our pipeline.

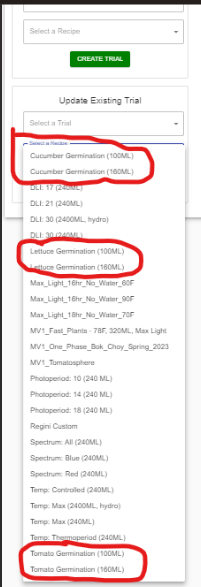
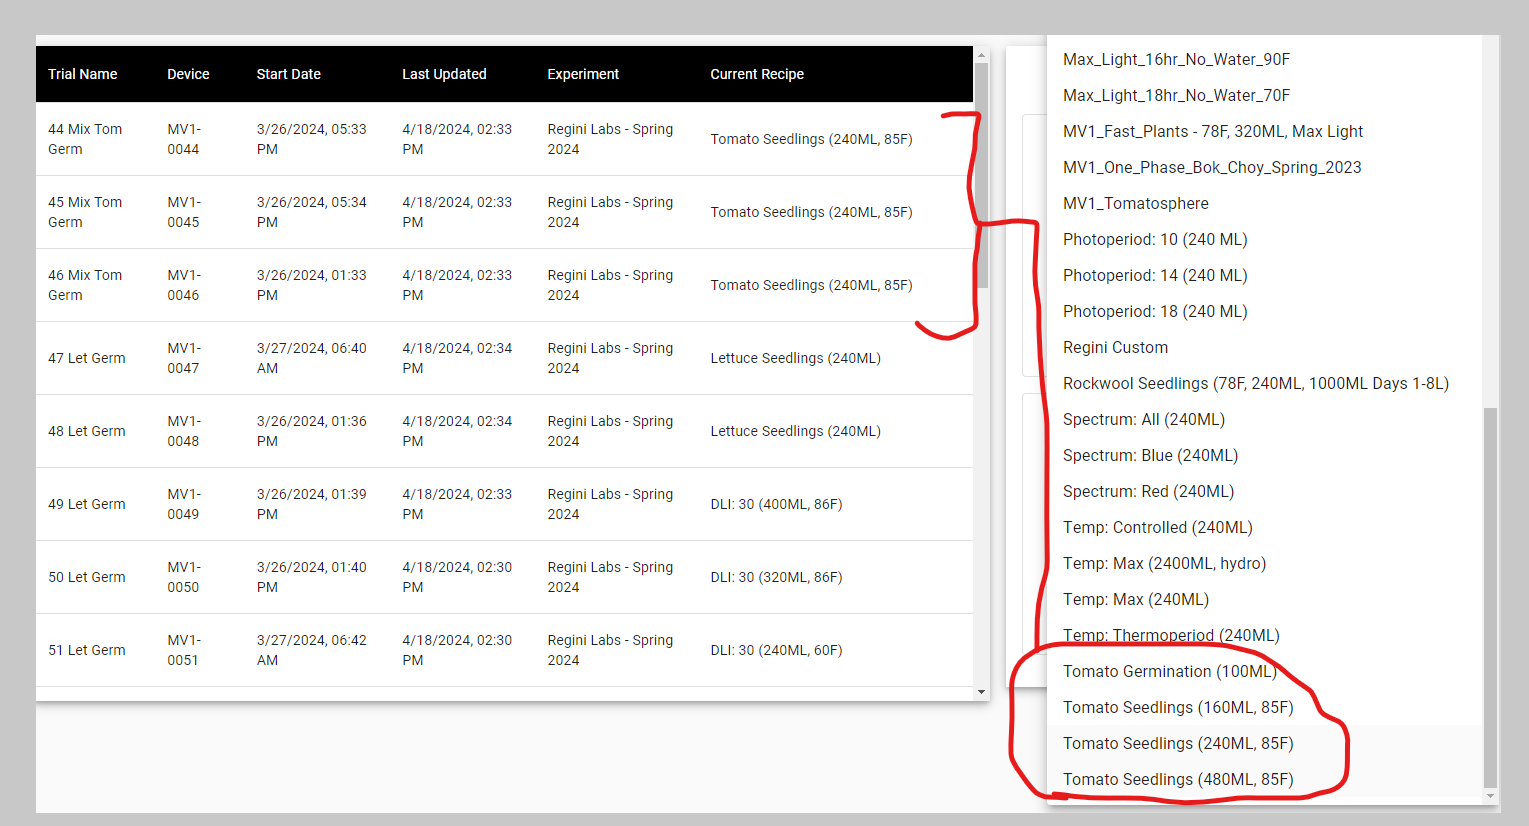
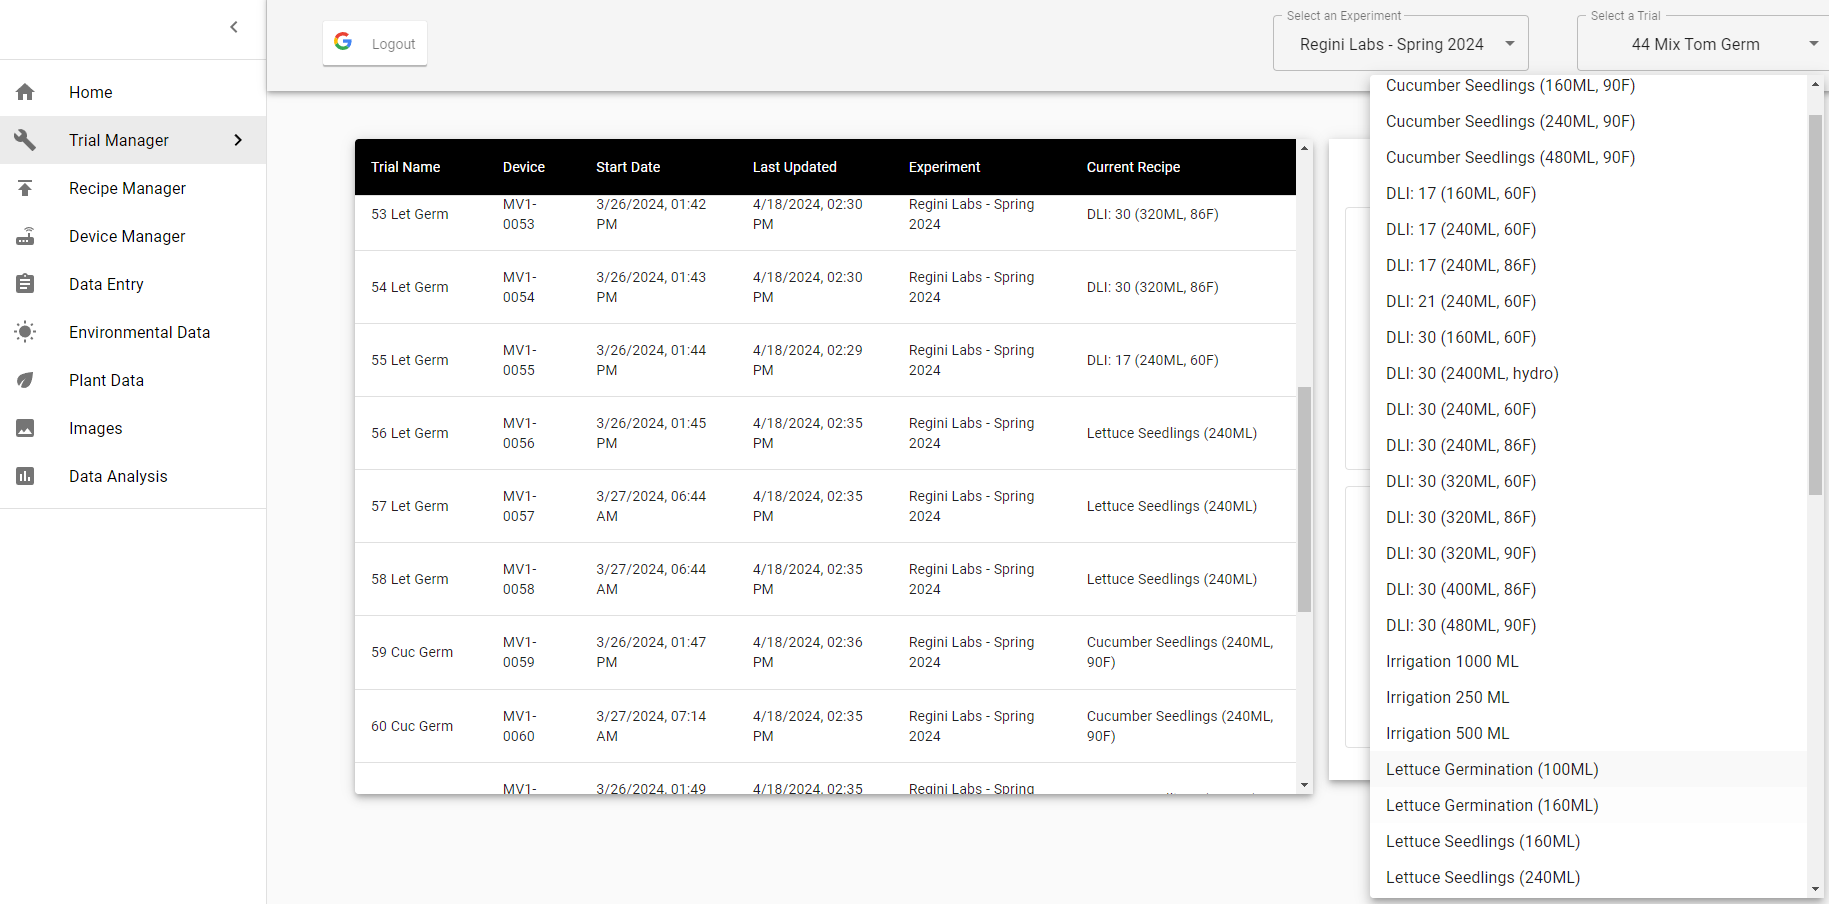
Recipes for cucumbers and tomatoes

I added recipes for cucumber seedlings with 90F temperature and variable irrigation from 160-480ML. Let me know if you want me to also add all the way up to 1000ML or one at like 0 ML if you wanted to dry them out by switching to that for a day manually.

I did the same for tomatoes, with the only difference being that those are set to 85F temperature.

There were already these variable irrigation recipes created for lettuce at 78F, so I just left those the same.
Cucumbers


Tomatoes

Lettuce

Nutrients

I would recommend that you start by mixing in about 500 PPM of nutrients for your tomatoes and cucumbers. Perhaps a little less (300 PPM) for your lettuce seedlings. That should be plenty over the next week to get them growing fast but not too much to potentially burn/damage them.

To be clear, I’m saying that if you were to take tap water and measure the ‘Electrical Conductivity’ using a ‘Total Dissolved Solids’ meter (like $10 on Amazon) and it came out to be 200 ‘Parts Per Million’ (abbreviated PPM) then you would add nutrients until it increases to be 700 PPM - an increase of 500.

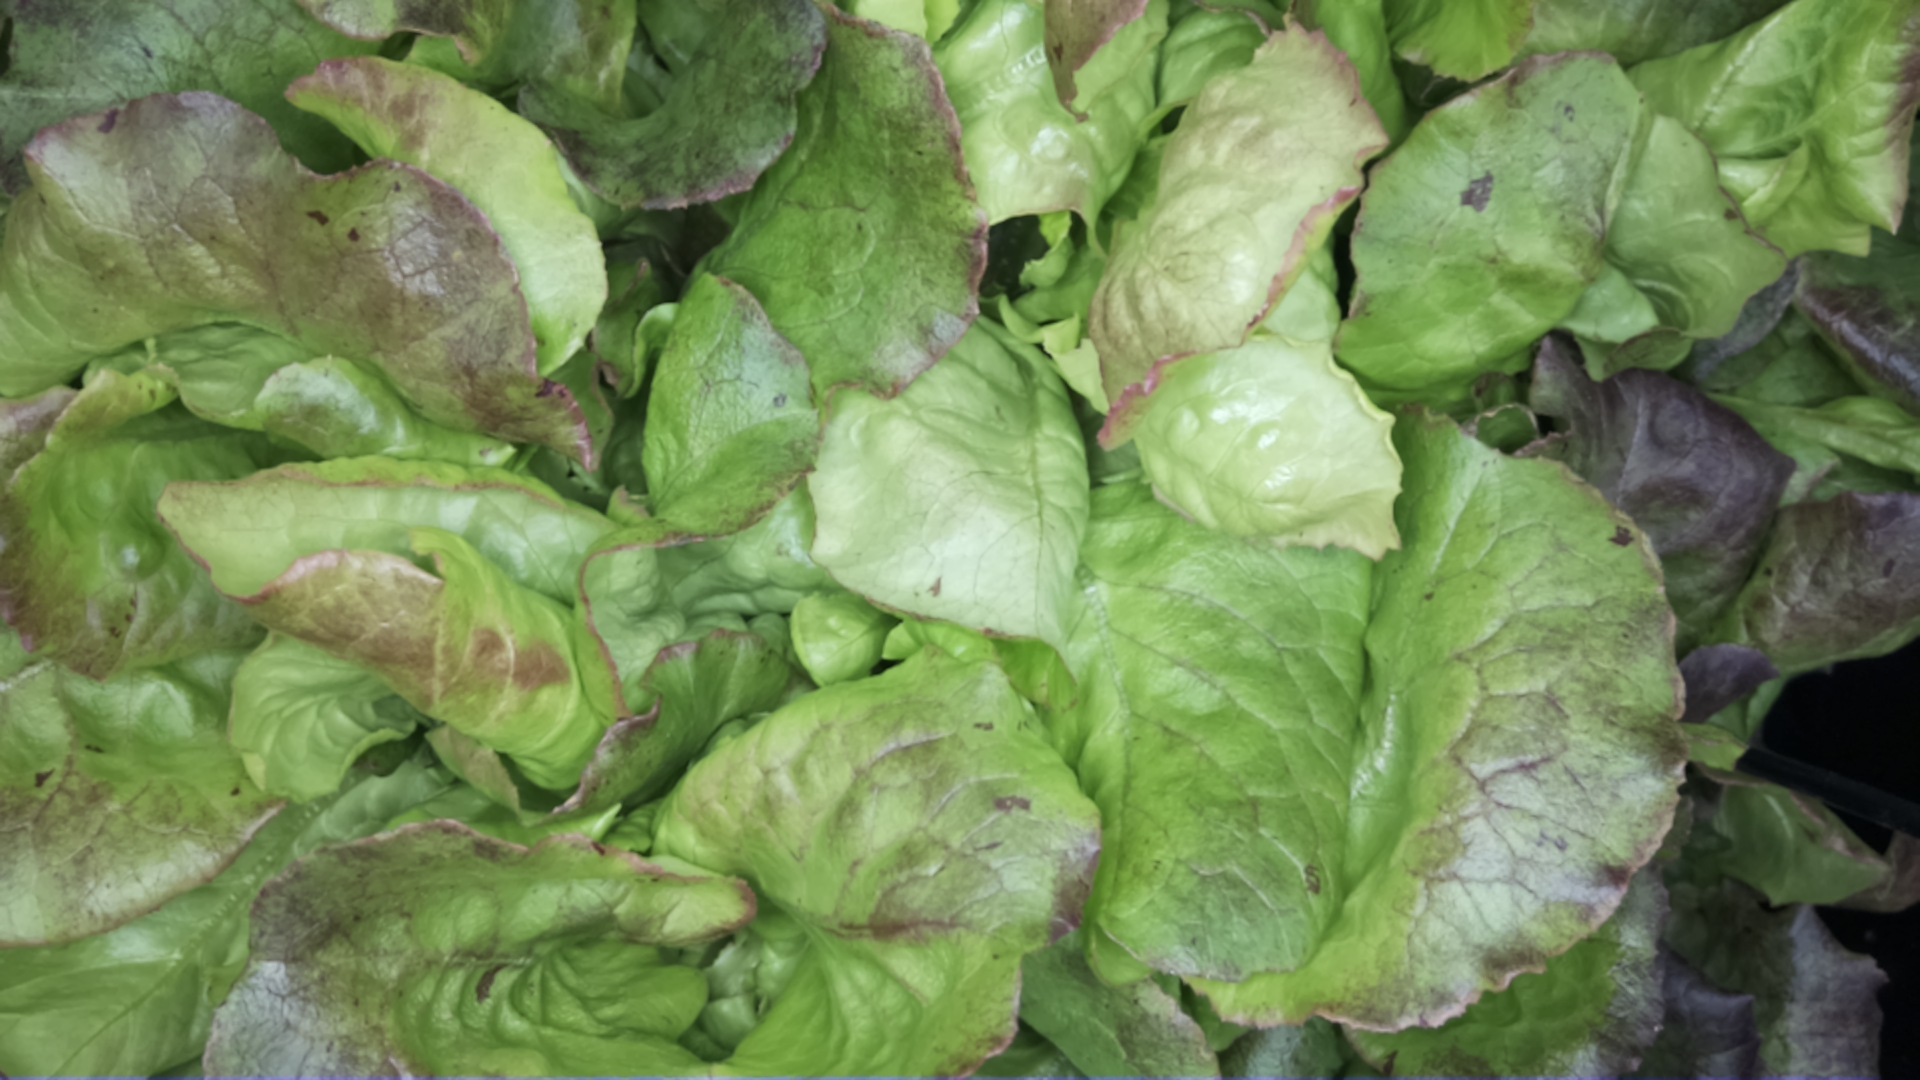
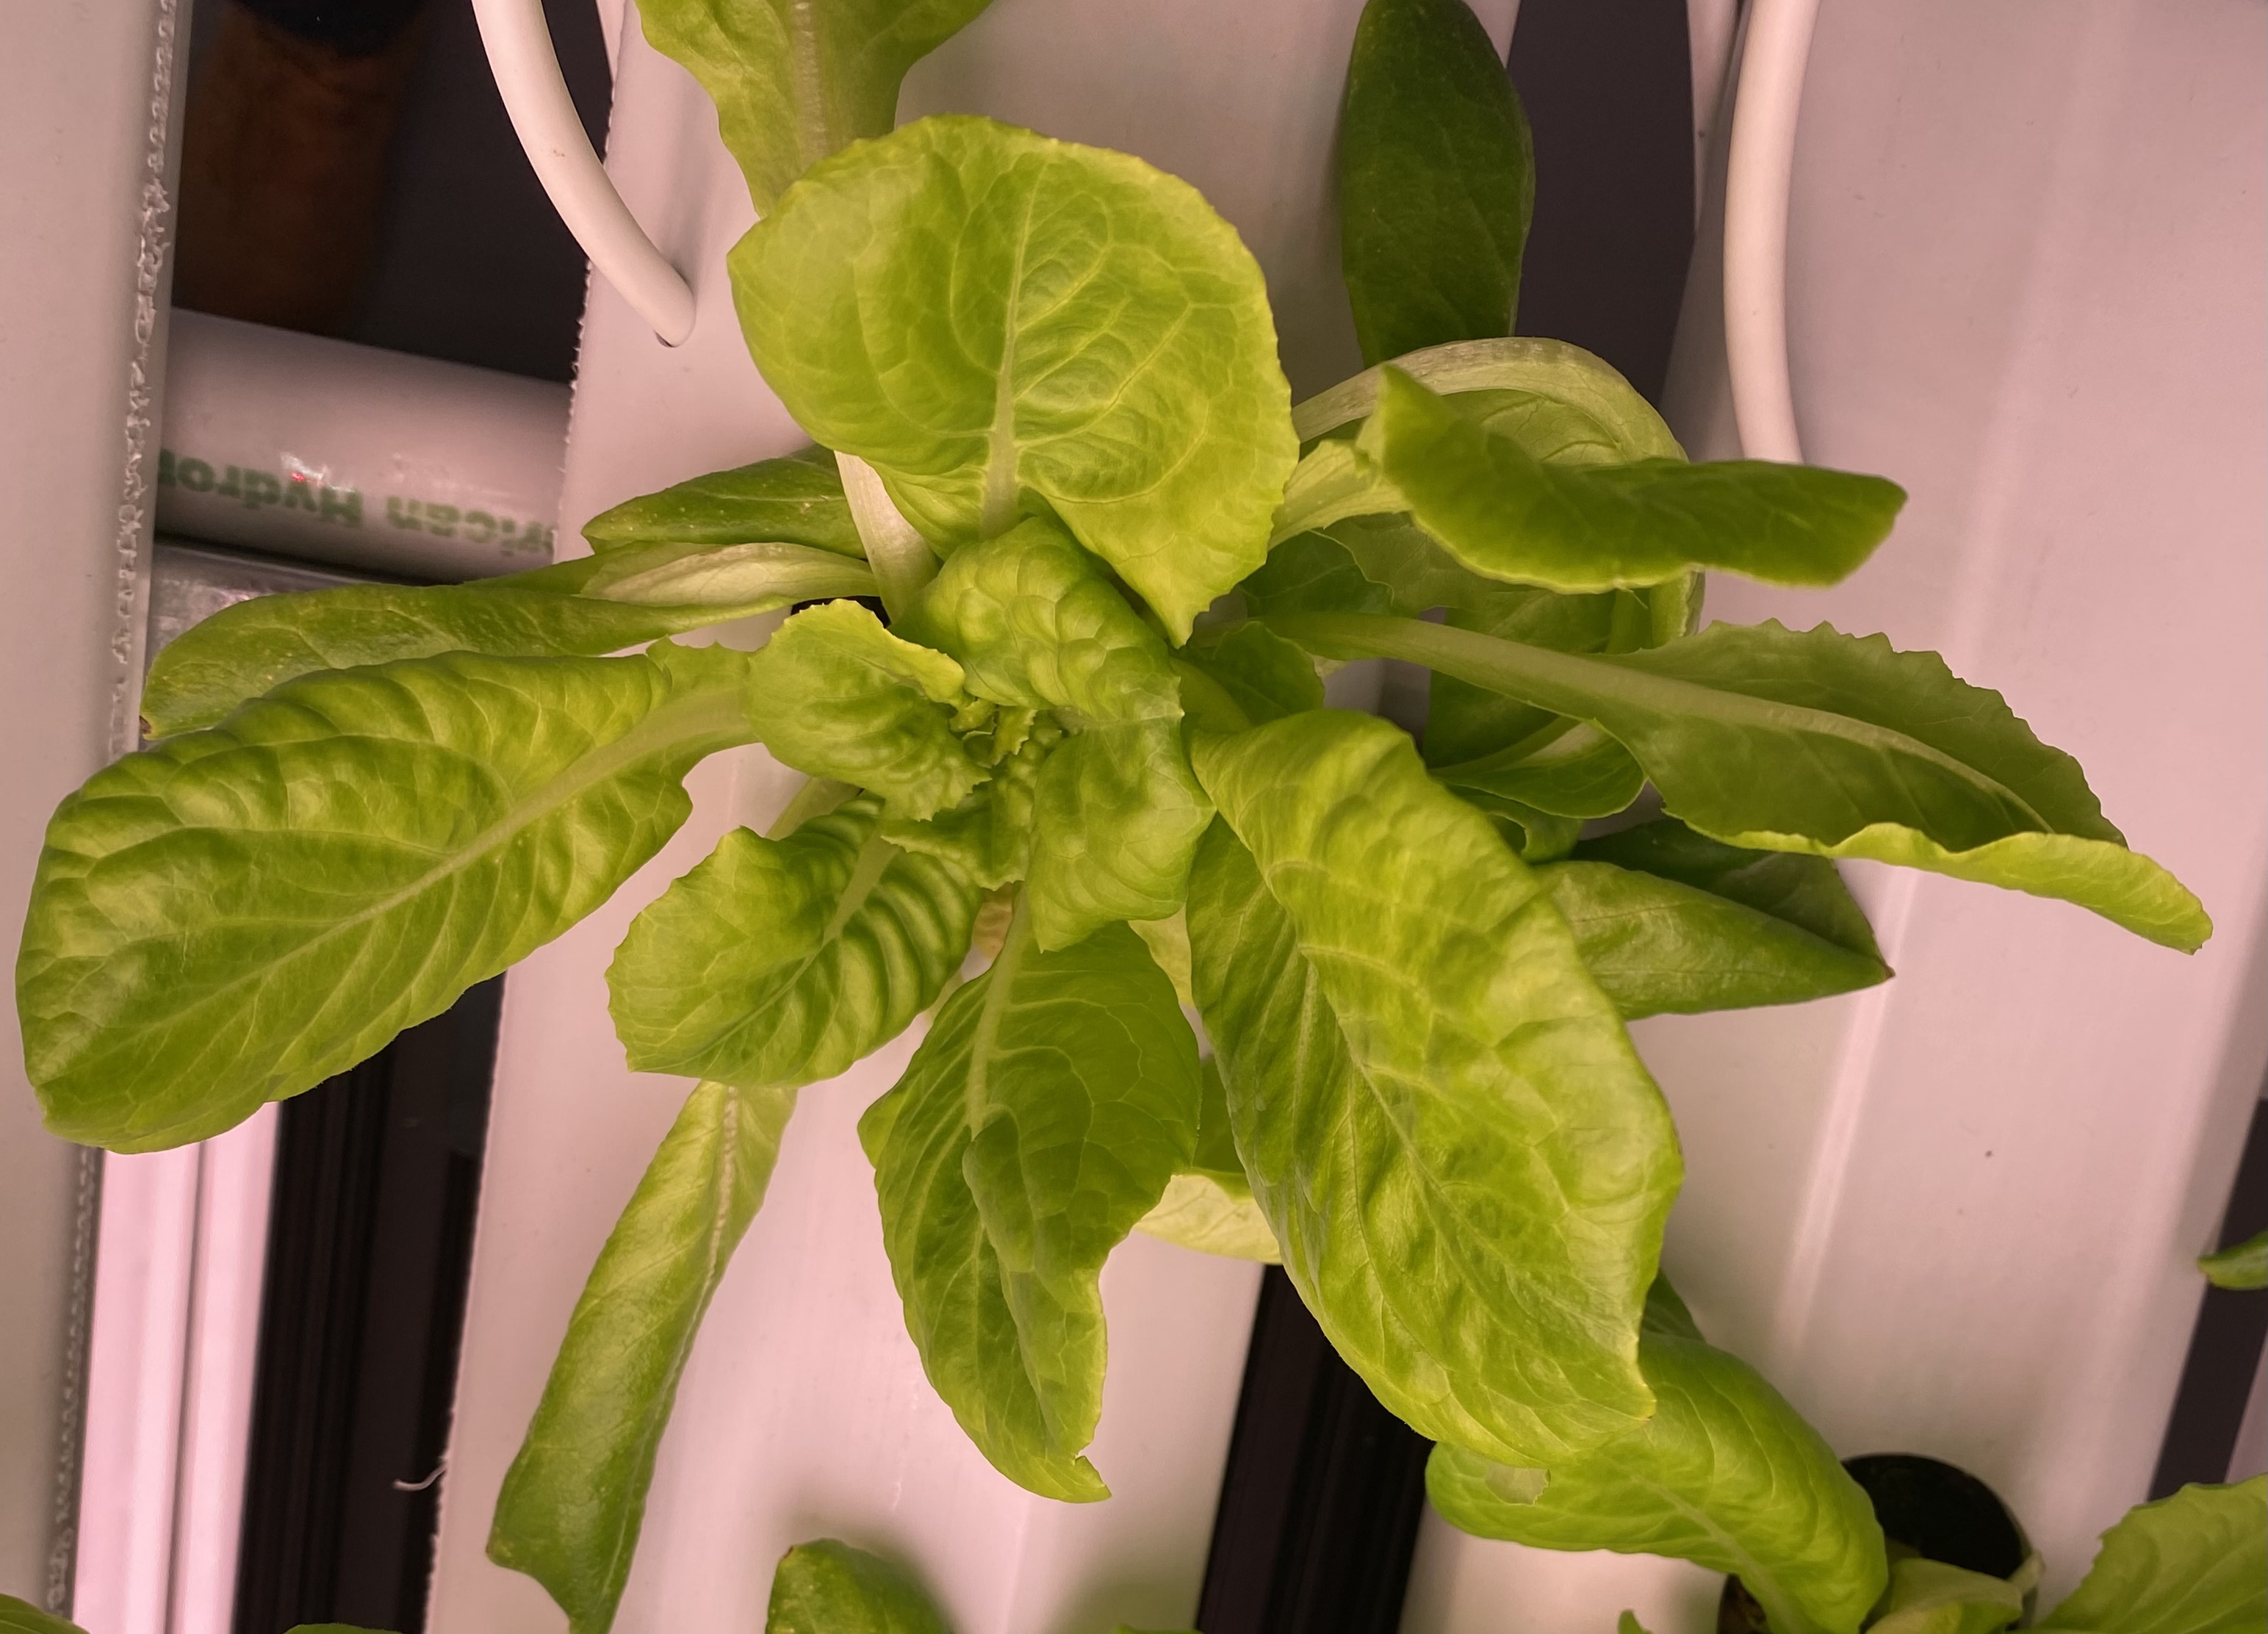
I’m going to recommend you keep the feed rate pretty low though for now - otherwise these plants are gonna get massive quickly. What you want though is to prevent any yellowing or deficiencies.

@cregini I went ahead and updated the seven devices (49-55) with their test settings to evaluate the different cultivars tolerance to heat/high DLI.

Also updated your tomatoes to run warmer, at 85F, they had been left at the default of 78F after our concerns about having enough water. Feel free to increase the amount of water (or decrease it if you’d rather not have algae) using the 160ML and 320ML irrigation options.

The same also applies for your lettuces/cucumbers - they all have dedicated recipes with clear naming and the ability to increase/decrease irrigation at will. Lettuce is set at 78F - FYI - I need to fix that in the naming still:

I think we have wrapped up a really successful first run with our batch of MV1s. We were able to modify remotely, and have proven that they are capable of tending to our germinating seedlings with minimal intervention. Within 1 week of adding nutrients to the reservoir we went from this…


to this…

They have since been transplanted into their finishing systems in the room.


where they have really started to show the typical red nature of the skyphos varietal within days.

A lot of the peripheral leaves needed to be trimmed away as the plants were really holding themselves up against one another and not forming tight inner growth.

I am now curious how much of the outer leaves should be removed in order to promote the plants to put energy into their new inner leaves which have started really taking off since transplant.


@Peter @Surendra I am curious to hear what you think about optimal ways to carry seedlings from the MV1 into a finishing environment where mass production can be optimized. How much is too much, or not enough, with respect to pruning?
I thought I could also share the tomatoes and cucumbers as well after a week of nutrient introduction.


Here are a few of them in their new systems…